


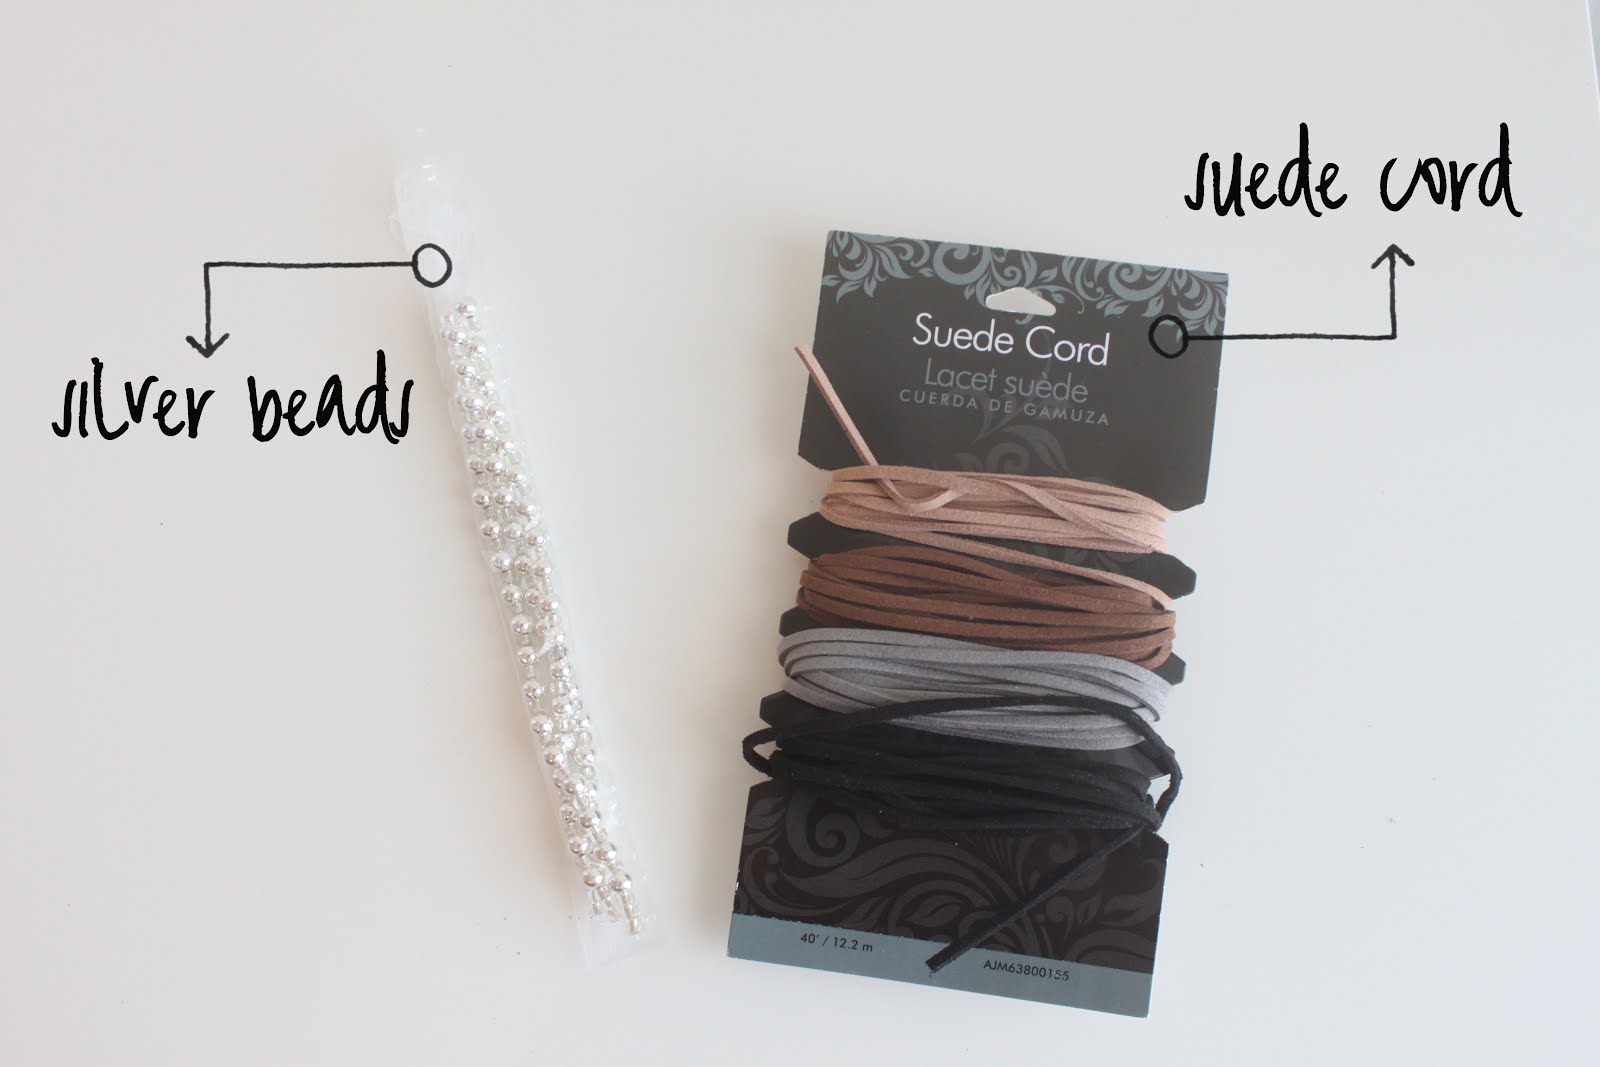
Despite my reservations, I was browsing the craft section recently on a trip to Walmart and I spotted some suede cording that was just screaming to be made into bracelets. I grabbed the cording and some beads and came up with these great knotted bracelets that have even ME wearing multiple bracelets all the time.
First to determine the length you need, wrap the cording loosely around your wrist. You need a length that is a little over 4 times your wrist size (it may seem big, but you'll be folding the cord in half and making lots of knots so if you're in doubt, make it too long so you have more to work with.) I have skinny little wrists, and my total length was 36 inches.
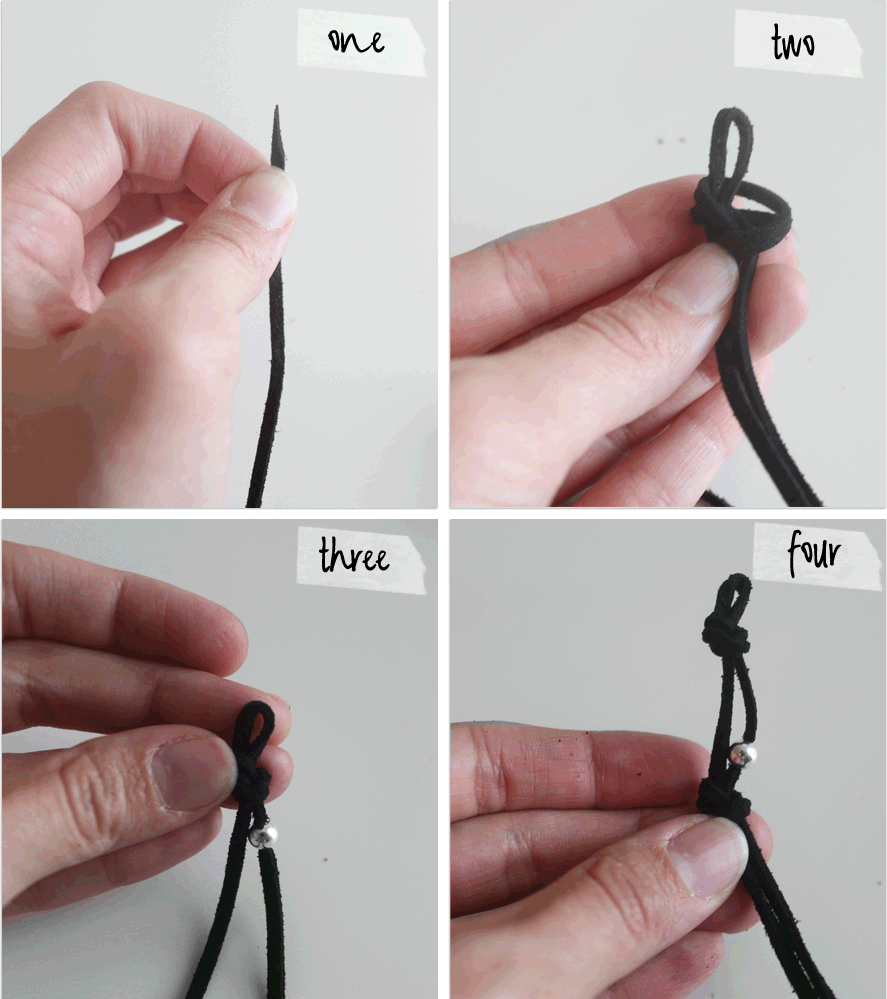
If you have small beads, you may want to snip the ends of your cording to make it easier to thread your beads on. Next, fold your cord in half and tie an overhand knot at the end to make a loop for the closure. Finally, thread your first bead on and tie a knot a little bit below the bead. Thread another bead on the side opposite where you strung the first bead and tie another knot. Repeat. Tie a knot at the end of the bracelet to finish.

Now you have a pretty knotted bracelet! You can buy all sorts of different colored suede cording and beads. I made a black and tan one because they go with everything, but I have some turquoise cording that I can't wait to make more with!

Layer them or wear one by itself, they're cute either way!

These are cute! I also have tiny wrists so most bracelets don't fit me. Love that we can customize this to fit though :)
ReplyDeleteSame here! I am so lucky to have a really kind friend who always makes a couple of friendship bracelets that will fit my wrist! Thanks for the tutorial, I think this is definitely doable for me :)
DeleteSaw these on Craftgawker and hopped over to pin! I actually just finished up a series on 5 stacking bracelets...this would coordinate with them perfectly! Thanks for the inspiration!! http://www.oneartsymama.com/2013/10/easy-diy-stacking-bracelets-crocheted-leather-cord-bracelet.html
ReplyDeleteThis is SUPER cute! {I tried commenting already but I don't think it worked, so if you get a duplicate, sorry!} Anyway, saw you on Craftgawker and had to hop over and pin this! It would coordinate perfectly with the set of stacking bracelets I just made; thanks for the idea! http://www.oneartsymama.com/2013/10/easy-diy-stacking-bracelets-crocheted-leather-cord-bracelet.html
ReplyDeleteWhat a brilliant and clear tutorial – and lovely colour combo, too :-)
ReplyDelete