Photobucket

Wednesday, November 27, 2013

Shannon's Living Room Makeover

I'm a compulsive re-decorator.  In our first house, I painted the living room 4 different colors in 2 years.  I think once, the paint only lasted a month before I decided I hated it.  (It was yellow... NOT my style.)  I felt myself reaching the point of boredom with our calming light blue walls in the living room in our current house and knew it wasn't really our style anyway. 
So, of course, I made a gradual change from light blue... to BLACK.  And let me tell you... I LOVE IT.  I have never loved a wall so much in my life.  I love my black wall and I'm not afraid of who knows it.  Below are the before and after with a few details shots.


We used the Martha Stewart metallic glaze to paint the subtle stripes on either side of the TV.  You can barely notice it unless the light hits it just right.  We also added the black stripe across the mantel shelf.  Our next major project will be to get the fireplace up and running... for which I am extremely excited!

Now for a super fun announcement! Michael Levine Low Priced Fabrics' Thanksgiving sale will be opened to our followers TODAY for a preview!  One day early!  Yay!  Here are the details:

This year they are running their sale from Thanksgiving until Cyber Monday (December 2nd).  Since their site is always first come, first ship, this is an amazing advantage. Beside getting your orders shipped first, you will get access to many items that may sell out once the sale goes public. Also, their cottons will stay at the everyday 10% off, plus the 20%. Yes, all cotton prints & cotton flannel will be 30% off. Now that's a deal!  Follow the banner below to take advantage of the one day jump start on this mind blowing sale!

http://lowpricefabric.com/


Check out our link party page to see where we link up each week!
photobucket

Monday, November 25, 2013

Brass and Rope Bracelet {Jewelry Blog Hop}

*** Want to buy a finished brass and rope bracelet? You can find it HERE in my shop!**


Hi everyone, Shannon and I are thrilled to be a part of a fun handmade jewelry blog hop and giveaway today! Several of us got together to create tutorials for jewelry that would make great gifts for the holidays. Check out all the gorgeous pieces these talented ladies came up with:

Handmade Jewelry Blog Hop
Be sure to check out all of the amazing tutorials for these jewelry pieces on these fabulous blogs: Flamingo Toes, Bombshell Bling, Eat.Sleep.Make., Crazy Little Projects, and The Scrap Shoppe.

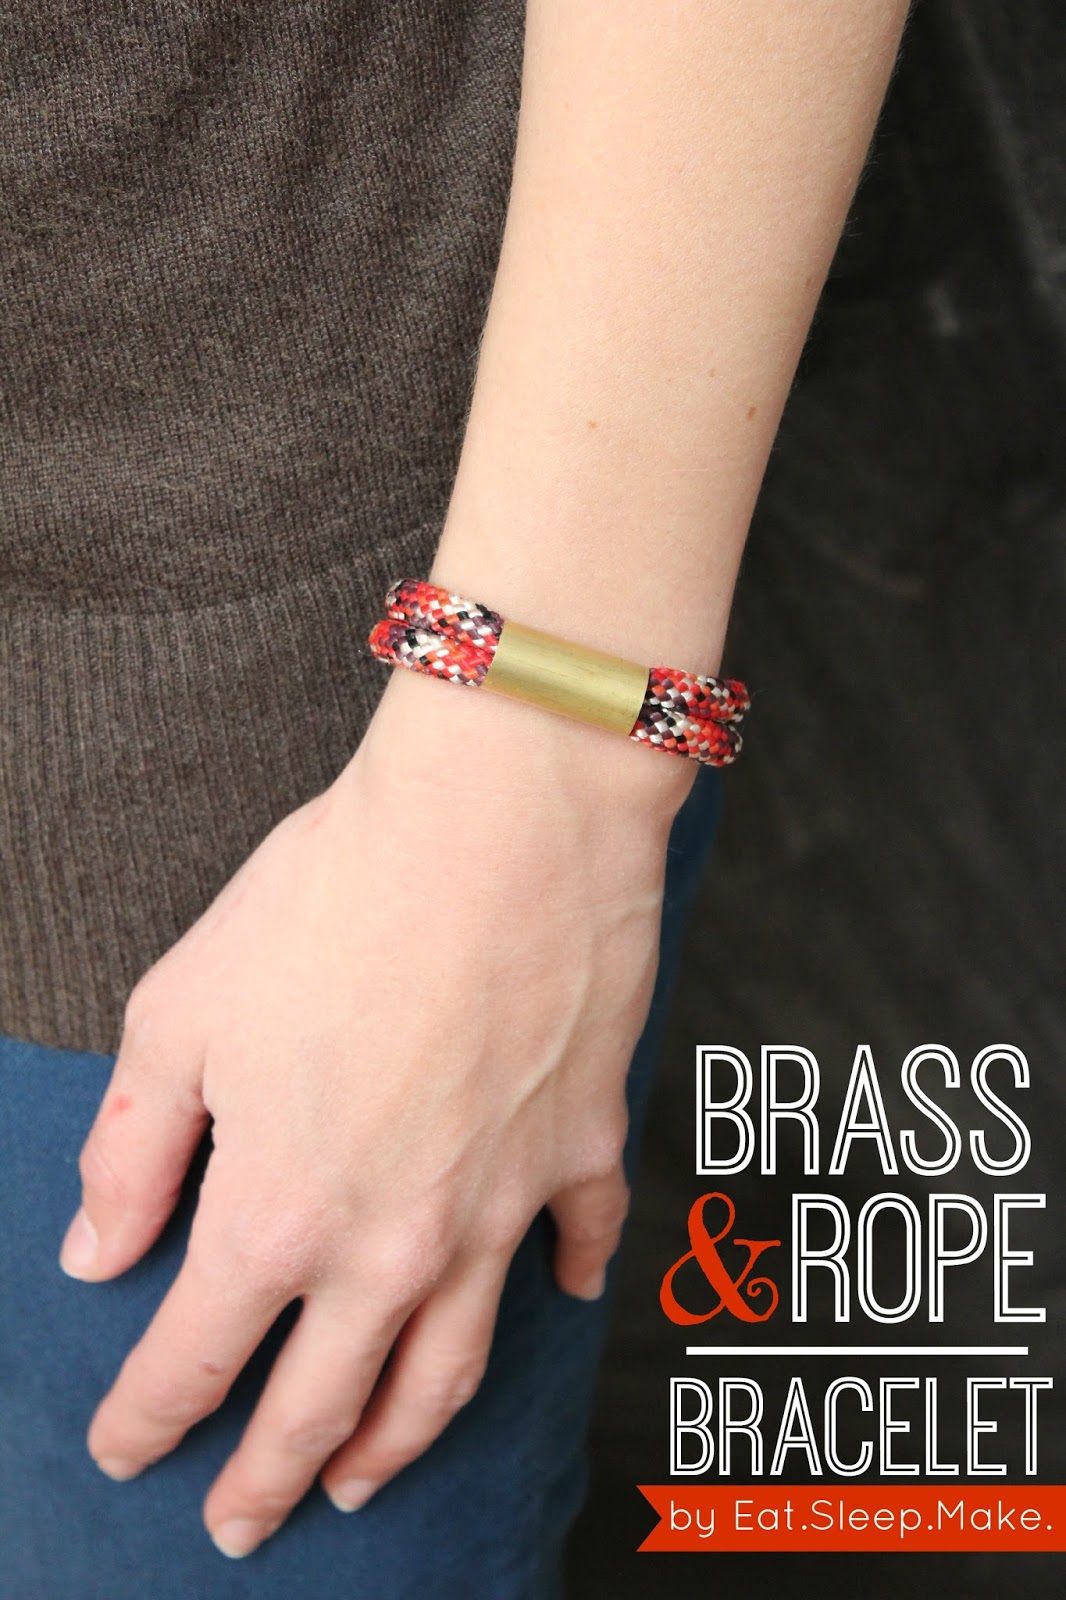
For my contribution to the jewelry party, I made some brass and rope bracelets with supplies that I found at my local hardware store. I love the modern edge that the brass tubing gives these bracelets. Warning: once you make these, you'll be buying out your local hardware store just to make jewelry (check out Shannon's paracord and scarf ring necklace for another hardware store-inspired piece.) And with all the different colors of rope available, you could make a whole slew of these bracelets to match your outfits or give as gifts.


This project does require using some tools, so get your hand saws ready (or save your fingers and get a man to do all the cutting for you like I did ;) and lets make some jewelry!


SUPPLIES: 18 gauge gold wire, 1 1/2 inch diameter brass tube, rope, round nose pliers, flat nose pliers, wire cutters, lighter, hand saw (or Dremel) and clamp, and sand paper.

You can find the rope and brass tubes at your local hardware store. There are many sizes of tubes to choose from, so if you'd rather make smaller bracelets for stacking go for it! Each brass tube will give you a bunch of beads when cut, so I suggest cutting the entire tube in pieces all at once so you don't have to go back and cut the beads one at a time in the future (just remember to sand the edges well!)


Making Your Brass Bead:

ONE: first, cut 15 inches of rope.
TWO: next, mark 1 inch of brass tubing with a pencil.
THREE: gently clamp your brass tubing (not too tight or you'll squeeze it out of shape) and carefully use a hand saw or Dremel to cut your tubing to size. Use sandpaper to sand the edges smooth.
FOUR: fold your rope in half and thread your brass bead onto the middle of your rope.


Use a lighter to carefully melt the ends of your rope to prevent fraying.

Closure - Making The Loop:

ONE: to make the hook portion of your closure, first you'll need to cut roughly 4 1/2 inches of your brass wire using your wire cutters. Bend one end of your wire slightly.
TWO: clamp the bent end of your wire around the looped end of your rope.
THREE: wrap your wire around your rope 3-4 times, clamping as you go.
FOUR: use your wire cutters to clip any extra wire.

Closure - Making The Hook:

ONE: now for the hook portion of the closure, cut 7 inches of brass wire with your wire cutters. Using your round nose pliers, gently bend the wire about 3 inches from the bottom. Squeeze the loop you made a little smaller with your pliers to make it more narrow.
TWO: 1 1/4" down from the loop you just made, use your round nose pliers to bend the longer wire at a 90 degree angle sideways as shown above.
THREE: this is what your wire should look like so far.
FOUR: place the piece you just made on the ends of your rope as shown above.


FIVE: clasp your hook and rope with your flat nose pliers and begin to wrap your rope with the end of the wire that is sticking out.
SIX: wrap the rope 3-4 times, or until secure, and snip the ends with your wire cutters.
SEVEN: grasp the middle of your loop with your round nose pliers and fold down as shown above to complete your hook.


It's a simple piece, but it can be customized however you want depending on the color and pattern of rope you choose! I also made several in blue (because blue is my favorite color and I couldn't help myself.)


I can't decide which version I like the best! Good thing I have 10 feet of extra rope so I can make extras ;)

So how about a fun giveaway to win 11 pieces of jewelry, including one of my brass and rope bracelets?

Enter using the Rafflecopter widget below!

a Rafflecopter giveaway


Friday, November 22, 2013

13 Pretty Thanksgiving Place Settings


I love all the wonderful food, family, and joy that Thanksgiving brings. Thanksgiving is all about the coming together of friends and family to give thanks for everything we have been given. Rather than jumping right into Christmas, why not savor fall and Thanksgiving before it ends? To help inspire you, we've rounded up 13 pretty place settings perfect for your Thanksgiving table that you can easily replicate yourself. Some are as easy as gathering some spray paint and fake fruit, while others involve displaying fresh flowers and fall veggies in creative ways. Whatever design you choose, you can't go wrong with any of these beautiful tablescapes.


Check out our Link Party Page to see where we link up each week!
photobucket

Wednesday, November 20, 2013

Polymer Village Planters


I'm sharing a fun little project I did to give homes to some lonely little succulents.  And when I say little... I mean itty bitty.  

All you need is:
Polymer Clay
Rolling Pin
Ruler
Knife
Parchment Paper
Baking Sheet
Glue gun
+
Dirt and a plant!

First, cut 1/5 of your block of polymer off and roll it out to be about 1/8" thick. Cut 2 squares that are 2"x2".  Cut 2 squares that are 2"x1 3/4".  Next, Cut the front of the house with a peak on the front.  That should be 5 total pieces. 

Now, bake them according to the instructions on your clay.  Make sure they are laying completely flat on your baking sheet!

After they are baked and cooled, paint the windows, doors and any other accents you'd like to add.

Piece your house together and use a hot glue gun to seal the edges and make it water tight. 
Use the 2 pieces that are 2" x 1 3/4" as the sides so they will fit snuggly between the front and back pieces.

Next, plant your succulent and water!


I made a tiny village of these for my windowsill in the kitchen.  I absolutely love them!


Check out our link party page to see where we link up each week!
photobucket

Monday, November 18, 2013

10 Minute Flannel Infinity Scarf


I am STRAIGHT UP obsessed with plaid this year.  It's everywhere.  And I love it.  I was lusting over a tartan plaid infinity scarf on Etsy that was going for $35 and of course, like any good crafter/blogger, I reacted by saying, "I can SO make that."  So I hit up the fabric store, found some amazing feeling flannel and raced home.  Within 10 minutes of sitting down I had myself an identical scarf to the one on Etsy for a mere $4 (got the fabric on a wicked awesome sale!)

All you need is a sewing machine and 2 yards of flannel.  I cut mine to be 22" thick and the full 72" long.  

Next, sew a single stitch along the long sides to prevent fraying.  (Although, I like the little bit of fray that resulted up to the stitch line.)  Next, sew your two short ends together.

THAT'S IT.  The best part?  This is even great for a guy. My husband immediately requested one for himself.  He loves scarves, but never seems to know how to wrap/tie his properly.  Problem solved.


Check out our link party page to see where we link up each week!
photobucket

Friday, November 15, 2013

9 Handmade Holiday Hostess Gifts


I'm kind of old school... traditional and I believe that when one is a guest at someone's house for a party or a holiday gathering that one should bring a gift for the hostess.  Let's be real here.  We are all 150% aware of the time, effort and sacrifice that goes into throwing even the smallest of dinner parties.  I love showing my gratitude for all that hardwork by giving little gifts.  It may seem small and meaningless to you or someone else, but to that person that slaved away cleaning and cooking and decorating to entertain you... that small gestures of thanks means the world.  

I've rounded up 9 absolutely adorable handmade holiday hostess gift ideas for you.  Some of them take no time at all, but will make such a huge impact!  I really do encourage you this holiday season to show your appreciation for those opening their homes to you.  It's so easy... and so rewarding, too.


Check out our link party page to see where we link up each week!
photobucket
Related Posts Plugin for WordPress, Blogger...