Photobucket
Showing posts with label foodies. Show all posts

Friday, November 1, 2013

7 Tasty Twists on Thanksgiving Traditions


Thanksgiving is my favorite holiday.  There's no pressure of buying gifts or even decorating... just eating, being with family and being grateful.  As a kid, it always meant seeing my cousins that lived so far away, putting on skits and dances, playing football and eating... so so much eating.  Of course, things change as you get older.  Thanksgiving signifies the beginning of Christmas shopping... the madness, the anxiety.  I've decided, though, that this year, Thanksgiving day will be only about counting my blessings.  And making sure that everyone I love knows that they're considered one of them.  That's going to be my kickoff to the holiday shopping season... giving my gratitude to those I love.

Now, I'm always looking for new ways to do old things, so I rounded up some AMAZING looking recipes that I am most likely going to give a shot this holiday season!  Check out 7 tasty twists on Thanksgiving traditions...


The Cranberry Sauce Twist

The Mashed Potato Twist

The Green Bean Twist

The Mac & Cheese and Dinner Roll Twist

The Pumpkin Pie Twist

The Brussel Sprouts Twist

The Sweet Potato Twist


Check out our link party page to see where we link up each week!
photobucket

Monday, September 23, 2013

Baked Cinnamon Sweet Potato Wedges


Up until this year, I always hated sweet potatoes.  Then I had one, singular sweet potato fry... and my world was changed forever.  Now, I will devour anything that contains sweet potatoes.  I took a swing at cooking them for the first time and upon realizing I didn't have any brown sugar in the house, I had to improvise.  I grabbed the cinnamon, crossed my fingers, and sprinkled away.  The outcome was amaaaaaazing.

Ingredients:
4 sweet potatoes (peeled and sliced into wedges/fries)
1/3 cup butter (sliced)
Cinnamon
Himalayan Pink Salt
Fresh cracked black pepper

1 - Preheat your oven to 450 degrees

2 - Peel and slice sweet potatoes into wedges/fry shape.


3 - Place slices of butter every inch or so on top of potato slices. 

4 - Add salt & pepper to taste

5 - Sprinkle cinnamon on top using fingers.


6 - Cover with foil and bake at 450 for 40 - 45 minutes


Now eat them and love them!!!


Check out our Link Party Page to see where we link up each week!
photobucket

Wednesday, September 11, 2013

The Best Grilled Cheese Ever + Homemade Pesto


Obviously, you are all fully aware that I am a vegetarian and pretty much the only reason I don't call myself vegan is because of my undying love for cheese.  I love cheese so much that on my shirt for the Pittsburgh Marathon 5K this year I considered writing "I Run for Cheese" instead of some noble cause like most others.  I believe in honesty, people.  (I ended up leaving the "I run for ___" empty).  Anyway, this grilled cheese is going to rock your world. It's unreal.

Grilled Cheese Ingredients:
Fontina cheese
Whole grain bread
butter (or whatever you prefer to use to help toast the bread)
Tomato
Pesto

Pesto Ingredients:
One large package of basil
1/3 cup extra virgin olive oil
1/8 cup pine nuts
1 clove garlic
Himalayan Pink Salt
Fresh cracked black pepper
1/4 cup freshly grated parmesan cheese


Let's start with the pesto first:

1 - Put your basil, pine nuts and garlic in your food processor and pulse until all chopped up.

2 - Add the oil, then salt & pepper to taste. Pulse until smooth.

3 - Add in cheese and mix until incorporated. 

Now onto the Grilled Cheese!


1 - Keep your stove top on medium heat.  Melt better in frying pan.
 2 - Place slice of bread in pan with cheese on top.  Cover with a lid to trap the heat in so the cheese will melt.
3 - Once the cheese has started melting, place the tomato on the cheese. 
4 - Spread pesto on second slice of bread, then place on top of tomato. 
5 - Flip sandwich and cover again until bread is toasted.


Now dig in and enjoy! 


Check out our Link Party Page to see where we link up each week!
photobucket

Wednesday, August 28, 2013

Vegetarian Stacked Tostada Pizza


This is by far one of my favorite vegetarian meals to make!  It's a little time consuming, but easy... and not to mention DELISH!

Ingredients:
5 flour tortillas (9-10 inches)
2 tablespoons extra virgin olive oil
1 diced sweet onion
2 minced garlic cloves
1/2 teaspoon ground cumin
2 cans black beans (drained and rinsed)
1 can of beer (12 oz)
1 small package of frozen corn (about 10 oz)
Green Onions
1-2 bags of shredded Mexican cheese (amount depends on you!)

You will also need a spring form pan.
1 - Preheat oven to 400 degrees


2 - Saute diced onion, garlic and cumin in a large sauce pan.  Salt & pepper to taste.  Cook until onions are soft.

3 - Add beans and pour in can of beer.  Bring to a boil, then reduce the heat and let simmer until almost all of the liquid is gone.

4 - Remove from heat and stir in the corn and 3/4 of the green onions.


5 - Place 1 tortilla in bottom of spring form pan.  If it is too big, trim the tortillas to fit with a knife.  Spread 1/4 of the beans filling on first tortilla, then cover with cheese.  Repeat this 3 more times.  You should have 4 layers. 

6 - On the top tortilla, cover with cheese.

7 - Bake for 20 minutes.

8 - Garnish with toppings of your choice!  We sprinkled more onions on top + cilantro + cilantro lime ranch dressing and salsa.  We also cut up some lettuce and tomato to compliment the dish.


Cut in wedges like a pizza/pie and dig in!


Check out our Link Party Page to see where we link up each week!
photobucket

Wednesday, August 14, 2013

FOOD: Portabello Sliders & Crispy Garlic Brussel Sprouts


One of my favorite meaty foods as a vegetarian is mushrooms.  I love me some fungi!  This portabello slider is such a quick and easy meal... and it's DELICIOUS!

Ingredients:  
Portabello caps
EVOO
Balsamic Vinegar
Garlic
Asiago Cheese
Tomato Slices
Alfalfa Sprouts
Multi grain bread (I used multi grain ciabatta.. yummy!)


First, get the dirt of your bellos.  If the stems are still attached, cut them out, hollowing out the center.  
Next, drizzle some EVOO and balsamic vinegar in a frying pan on medium heat.  Place the bello in the pan and let cook for a few minutes on each side (top and bottom) flipping with tongs.  When you notice liquid starting to bubble up in the center when the hollow part is facing you, it's most likely cooked all the way through.  Now add your yummy stuffing!

I sliced garlic finely, then filled the rest of the cap with shredded asiago cheese.  Cover the caps with a lid to trap the heat and allow the cheese to melt.  

Once the cheese has melted, you are good to go!  


I chose some fresh brussel sprouts to accompany my sliders.  Just cut them in half and put in a big sauce pan with EVOO, salt, pepper and granulated garlic.  Sear them until the granulated garlic has turned crispy and almost caramelized on the sprouts.  


Now eat and let the chorus of mmmmmms and yummmmms and oh my's ring!


Check out our Link Party Page to see where we link up each week!
photobucket

Wednesday, March 27, 2013

FOOD: Almond Cream Cheese Roses


This ridiculously simple recipe is one that my mom used to make for us growing up.  We literally devoured every single candy within minutes of it being made.  I put a little twist on this by hand molding roses out of the candy dough.  These are small enough to not be sinful, but big enough to count as a whole dessert. 

I think these would be perfect to serve after a meal on a spring Sunday afternoon with fresh flowers adorning the table and the birds chirping outside.  Sounds divine, doesn't it?  I ate some last night after making these while yelling at Abby Lee Miller (Dance Moms) on my TV, covered in powdered sugar and cream cheese while my animals were trying to scale my sweatpants to get the cream cheese off my sweatshirt.  Not quite as peaceful and serene as the picture I painted up there, but I still enjoyed my treat nonetheless!

Ingredients:
2 1/2 cups powdered sugar
3 ounces cream cheese (do not use light cream cheese!!)
1/2 teaspoon almond extract
Food coloring

1 -  Put all the ingredients in a bowl and beat with an electric mixer.  I had mine on a medium setting and still ended up with powdered sugar all over the kitchen.  It will seem as if there is not enough cream cheese, but trust me, there is.  Just keep beating it until it turns into little chunks like the last photo above.


2 - Knead the chunks together until you get it consistently doughy.


3 - Split your dough 1/3 and 2/3.  You will need more pink than green.  Add one drop of food coloring to each batch.  Beat with your electric mixer until color is speckled throughout the dough.  Then, knead until color is consistent throughout.


4 - Take a small piece of dough and roll into a ball, squish into a circle using your palm and thumb.  Wrap the circle around itself to make a tube.  Make another circle and wrap that around the first tube on the side with the seam.  Repeat this over and over until your rose is the size you desire.  If your dough is too sticky for this step (sticking at all to your hands) put the dough in the refrigerator for about 15 minutes.  It will harden slightly and take away the stickiness.


5 - Make your leaves using the same roll and squish technique and shape with your fingers.  Use your fingernail to make the impressions of veins in the leaves.  Attach the leaves to the rose by smoothing the dough together with your finger tips.


 6 - Present and enjoy!

If you are not a fan of almond.. you can replace the 1/2 teaspoon of almond extract with mint extract or any other flavoring your prefer.  Also, make sure to keep these refrigerated because of the cream cheese.  They will turn into a gooey mess if you don't! 

If you don't have time to make the rose, use a silicone candy mold to get a cute, easy shape.  I took the leftover dough I had and made a bunch of little leaves with a mold to bring to work.  It still looks great, but cuts the time in half. 


Check out our link party page to see where we link up each week!
photobucket

Tuesday, December 4, 2012

SYS: "Can It!" Mason Jar Dishtowel {Bev with Flamingo Toes}


Thanks for joining us for Stuff Your Stockings, a handmade gift series at Eat. Sleep. MAKE.

Bev with Flamingo Toes is a jewelry making genius. She makes it look so easy (and it is!) Bev i's our go-to girl for any inspiration or questions we have when making jewelry. Her How To Page is full of fantastic tutorials on different techniques and supplies, and she breaks everything down so that it's easy to understand. One of our favorite things that Bev does each year is to host a week long Anthro Knockoff series where she posts fabulous tutorials on how to make gorgeous (and much cheaper) Anthropologie jewelry. You can find some of our favorites HERE and HERE.

Bev makes more than jewelry though, you can also find her making tons of cute tea towels, clutches, and other great accessories.

Today, we're happy to welcome Bev with a great gift idea for foodies!

------------------------------------------

Hello Eat. Sleep. Make. Readers!! I am so happy to be here as part of Jen and Shannon's Stuff Your Stockings series!

My name is Bev and I blog over at Flamingo Toes.


I LOVE creating things for the kitchen - aprons, dishtowels, potholders - really anything I can think of. It is so fun to decorate a kitchen with cute linens - I think it makes it more fun to cook! :)

I also have a leeeetle bit of a weird sense of humor - so I have to put my own funky little twist on things (like my "You are so hot!" potholder.)

Today's new dishtowel is so cute - and a little snarky too. :)

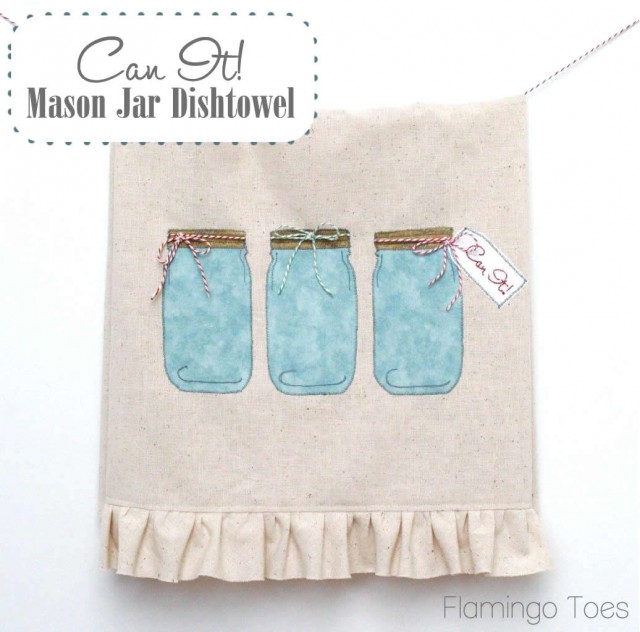
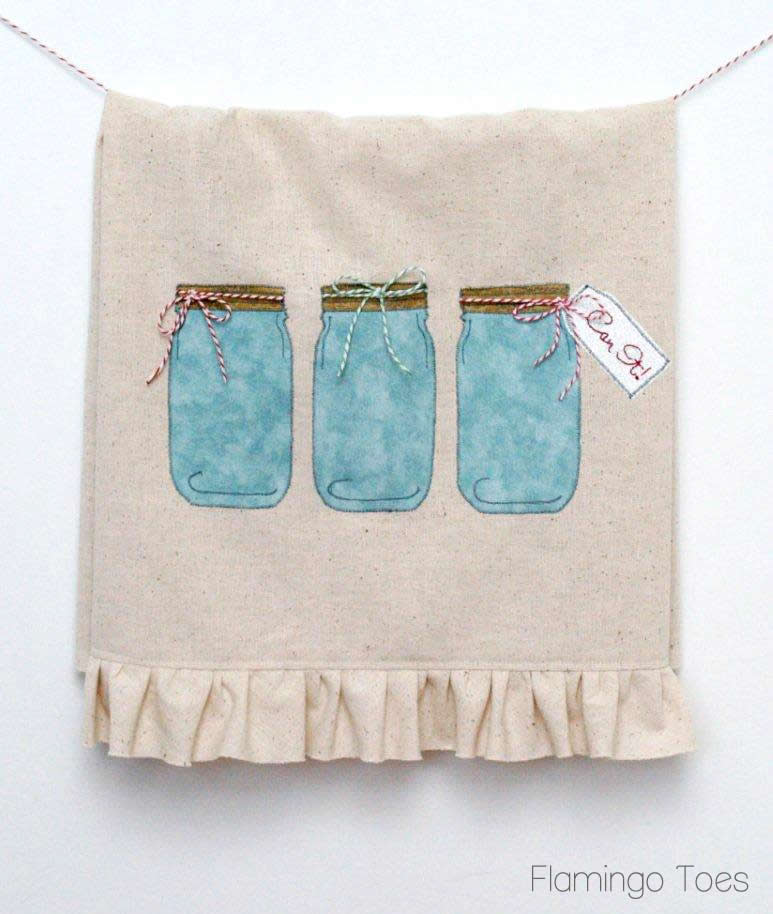
It's my Can It! Mason Jar Dishtowel!


Wouldn't this make a great gift for the foodie in your life? And you can totally leave off the little "Can It" label or change the wording if you don't feel like basically telling someone to shut it in their Christmas gift. ;)


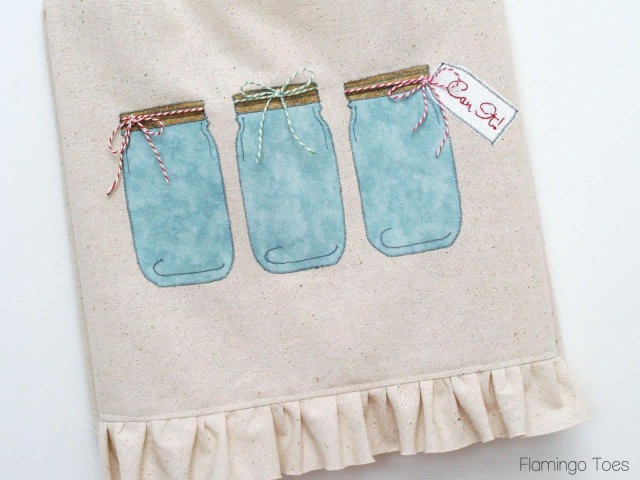
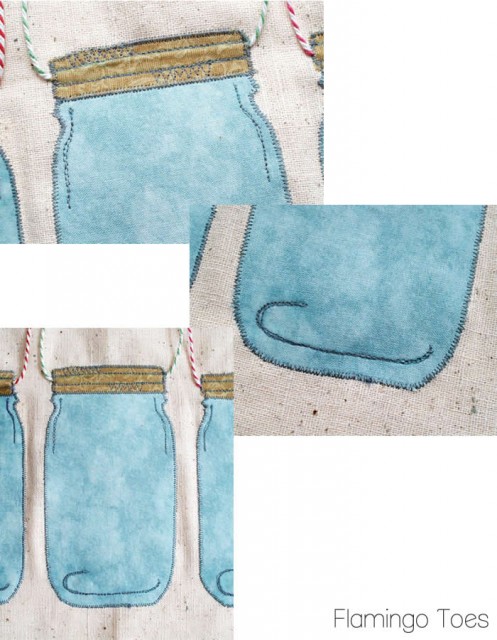
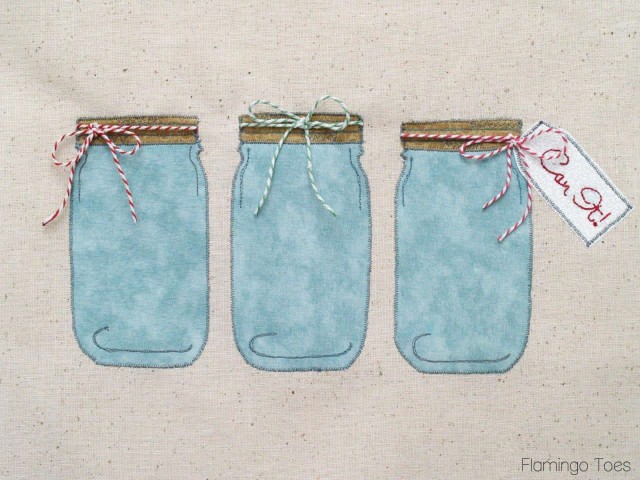
The Jars are stitched on, then embellished with just a wee bit of thread sketching. And they have baker's twine decorating the lids! So fun.

Here's what you'll need to make your own:
  • Fabric for dishtowel: I used osnaburg but you can use any canvas or linen, or use a purchased dishtowel. You'll need a piece 21" x 28" and a piece 2 1/2" x 56" (that little one needs to be cut on the bias)
  • Fabric for Jars, lids and label (see pattern for sizes - you don't need much)
  • Pattern (download HERE)
  • Baker's Twine
  • Wonder Under
  • Embroidery Floss
  • Glue (for ends of twine)
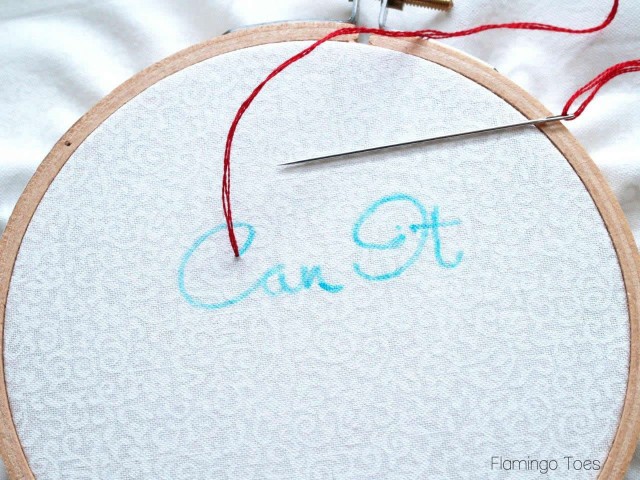
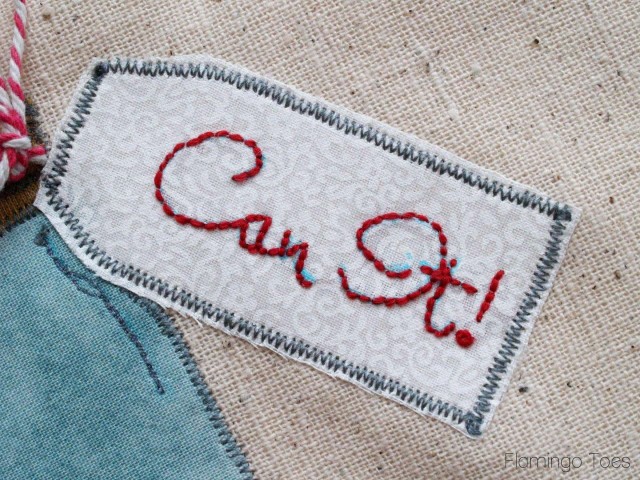
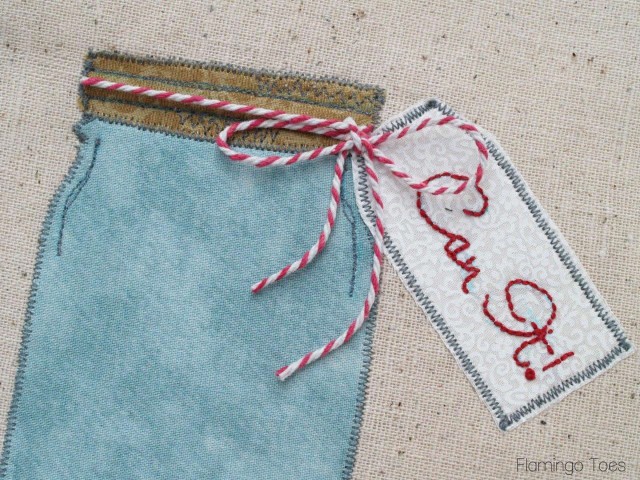
Start by embroidering your label. Trace the lettering onto a scrap of white fabric.

Use a back stitch to do the letters. If you need a tutorial you can find one on my How To Do That page for embroidery.

Pretend there's an exclamation point on there ok? I sort of forget to trace mine.


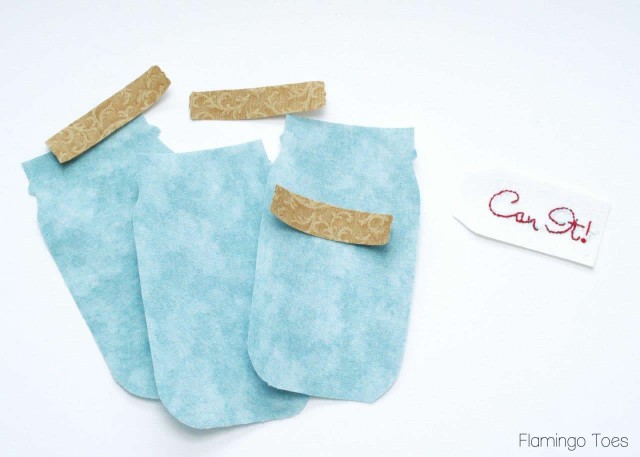
Once your embroidery is done, iron a piece of Wonder Under to the back and cut out your label piece.

Iron Wonder Under to your jar and lid fabrics and cut those pieces out as well.


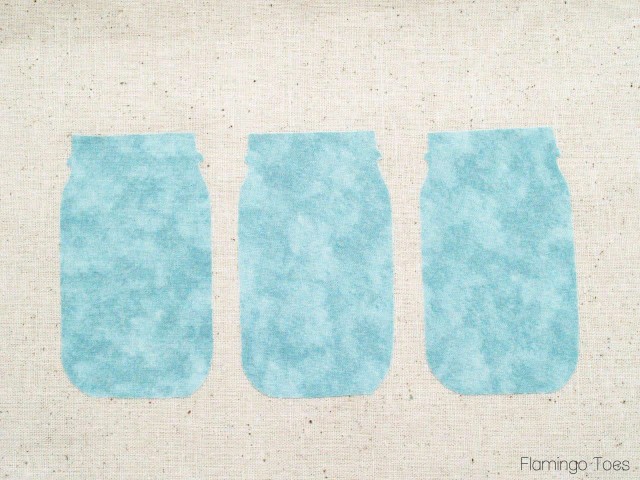
Lay out your jars on your dishtowel. Center the middle jar on the towel, about 4" up from the bottom of the towel. Place the other two jars on either side, 1/2" away from the center jar. Remove the paper backing and iron these in place.


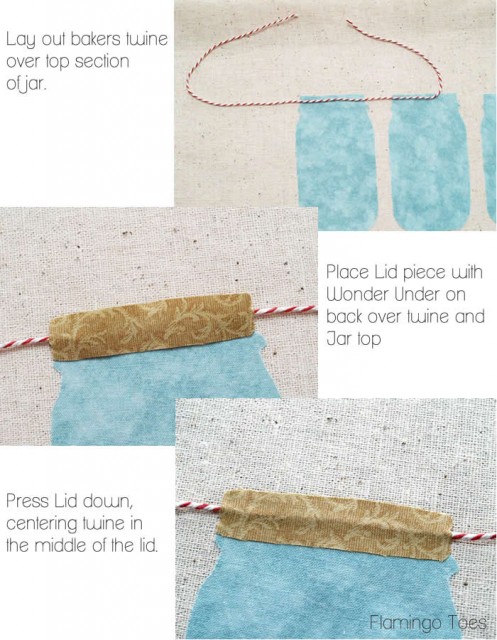
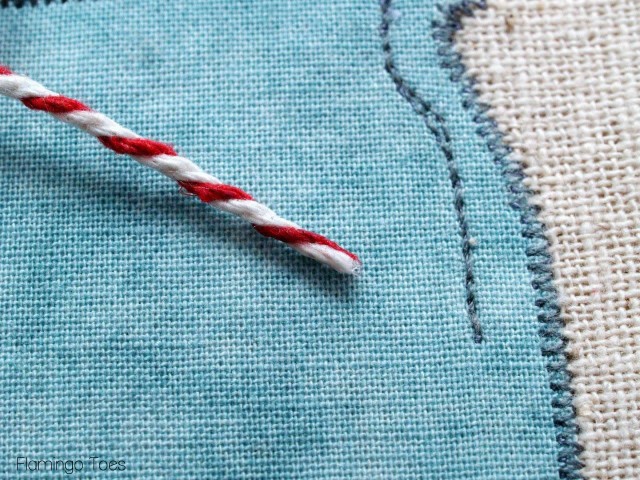
Cut three 24" pieces of baker's twine in whatever colors you want. I found that the thicker twine works best here.

Lay the twine over the top section of the jar. For the middle jar I centered the twine. For the left and right jars, I layed them out a little uneven since I wanted the bows off-center.

(So the left jar had more twine on the left side.)

Place the lid piece over the twine and jar top. Remove the paper backing and iron down, sandwiching the twine between the two pieces.


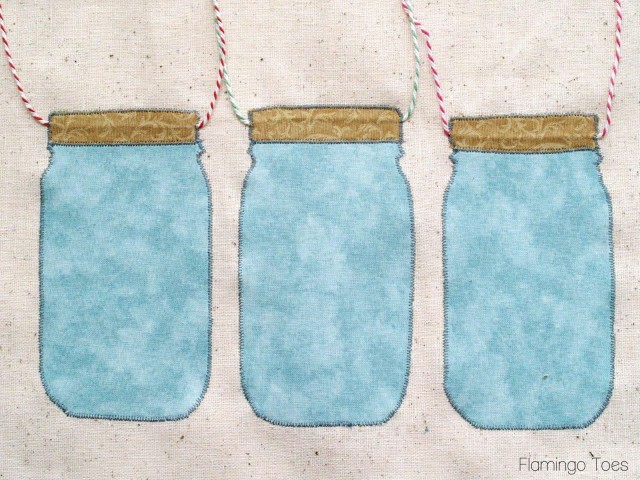
Once all your twine and lids are ironed on, sew around the edges of the jars and lids with a little tiny zig zag stitch. Sew right over the edges of the jar lids, sewing over the twine at the same time.


Now we're going to do our sketching. Lower the feed dogs on your machine and put on your free motion foot.

Mark the jars with the sketching lines that are on the pattern.

Sew over these lines, going over them as many times as you'd like. The more times you sew over them, the darker the lines will be.

For the jar lid, sew the horizontal lines on either side of the twine, then sew some zig zags in between the top and bottom lines, for a fun sketchy look.


Once your lines are all sketched on, tie the twine in the bows where you'd like them. Hand sew the knots of the bows in place.

Trim the bottoms of the bows so they're not crazy long or crooked and treat the ends of the twine with glue so they don't unravel.


Move the bow of your right dishtowel out of the way, then place the label to the side of the jar. Iron the label in place, then sew on with a small zig zag stitch.


Now we're going to finish off the dishtowel. Hem the two long sides and the end of the dishtowel that won't have the ruffle.

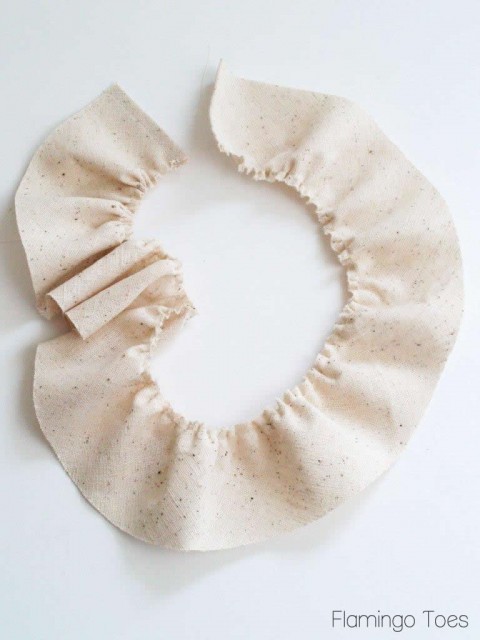
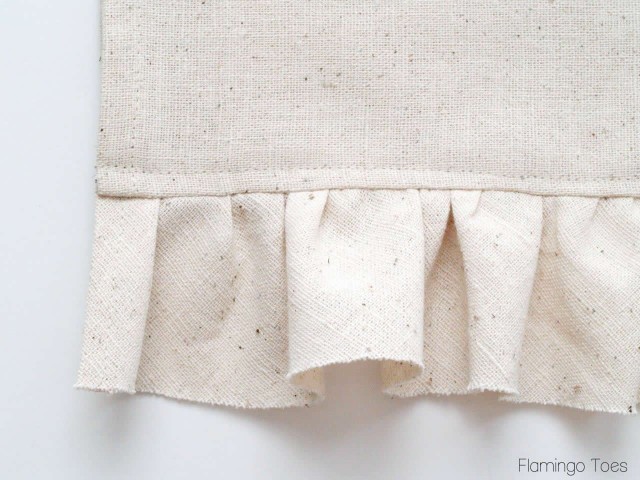
Hem the two short sides of the ruffle, then sew a gathering stitch 1/4" away from the top edge.


Sew the right side of the ruffle to the right side of the bottom edge of the dishtowel with a 1/2" seam. Press the ruffle down and top stitch the seam, 1/4" from the edge on the dishtowel side.


And you're all finished!!


So what do you think? Pretty fun right?

Thanks so much for having me guest post girls!


-----------------------------------------

Thank you, Bev! What a unique (and really cute!) gift idea, and the addition of the twine is perfect. 

I hope you enjoyed Bev's project, make sure to visit her at Flamingo Toes for more great projects and tips, and stay tuned for more great handmade tutorials throughout the week.
 

Related Posts Plugin for WordPress, Blogger...