Photobucket
Showing posts with label Made It for Me series. Show all posts

Monday, April 29, 2013

Made It for Me Wrap-Up and Giveaway by Southern Fabric!

We hope you've enjoyed our Made It for Me series! We've had a lot of fun making projects for ourselves for once, and we hope you're inspired to do the same.

Here is a quick recap of all the fun we've had this past week:


**THIS GIVEAWAY IS NOW CLOSED**

In the spirit of making something for ourselves, our wonderful sponsor, Southern Fabric, is giving away a $25 gift card to their online store so you can make something for YOU for once!


Southern Fabric has a fantastic selection of high-quality fabrics in different cuts. Here are some of our favorites:


1 - Noteworthy - Fly A Kite - Aqua by Sweetwater
2 - Marmalade - Floral Bloom - Pink by Bonnie and Camille
3 - Honey Honey - Tea Rose - Dark Blue by Kate Spain
4 - Mama Said Sew - Geometric Pinwheel - Grey by Moda
5 - Happy Go Lucky - Jump - Navy by Bonnie and Camille
6 - Salt Air - Fish Tales - Ocean by Cosmo Cricket


To win a $25 certificate towards some amazing fabric, enter our giveaway using the widget below. The winner will be announced here on ESM on Friday May 3rd. Good luck!


Friday, April 26, 2013

Made It for Me: Jen from Eat. Sleep. Make.


Have you been loving all the posts this week from our awesome guest posters? So much talent, and so many great projects! Well today, you're stuck with me :)


I love to make things for for friends and family. So much so that I tend to forget to keep some of it for myself. I have a problem though: it always seems to happen that when I make something for someone else, the project turns out almost perfect (as perfect as handmade things can be anyway.) When I make something for myself though, I always screw something up! Does that ever happen to you? I guess that's the nature of homemade items, but man I wish I could catch a break sometimes!

I'm not one to quit though, so for my Made It For Me project, I decided to make myself a wrap bracelet using some leather from the bag of leather scraps I found at an estate sale a year ago (yep, I'm stretching that leather as much as I can! See other projects I've used with the leather here and here.) And, in royal Jen fashion, I managed to place the snap in the wrong place on the bracelet so do as I say, not as I do :)


SUPPLIES: 5-7oz leather or pleather scraps (make sure it's soft and pliable, not the thick leather used for belts. You can buy scrap bags of leather at most craft stores), disappearing ink marker, leather snap kit with setter, rotary cutter and mat, scotch tape, E6000 glue, leather punch (a hole punch may work if your leather is thin enough.)


ONE: first use your rotary cutter and mat to cut the leather to size. When cutting your leather, remember that you'll be braiding it, which will reduce it in length, so it needs to be much longer than you may think. My strip of leather was 18 inches long and 1.5 inches wide.
TWO: flip your leather over to the wrong side and measure 1 inch down. Mark a line with your marker (make sure you do not cut above this line.)
THREE: make 3 separate, equal lines that indicate where you will cut your leather.
FOUR: using the lines as a guide, cut from the marks you made all the way to the bottom of the leather strip (again, do not cut above the first line you drew.)

Plaiting Your Leather:

The plaiting is a little tricky, so hopefully the diagram above will help. Make sure you plait loosely as you go. Once you reach #4 in the picture above, just keep repeating steps 2 and 3 (basically, you're crossing the middle pieces over each other, then crossing each side and repeating that. Make sense?)

Finishing:

ONE: when you've reached the end, tape the end of your bracelet and cut off the excess to make it all even.
TWO: cut a small strip of leather big enough to wrap around the taped end of your leather bracelet. Use your punch to punch a hole in the middle of the leather strip and in the end of your bracelet that was uncut. Punch carefully! As you can see, I made the hole for my snap too close to the end of my bracelet so line your snap up on the bracelet to measure where the hole should be first.
THREE: follow the instructions on your snap kit to attach your leather snaps in the holes you punched.
FOUR: use E6000 glue to glue the leather strip to the taped end of your bracelet, and hold in place with a clothes pin or something similar. Allow to dry according to the instructions on the bottle.

Wrap twice and snap closed. This wrap bracelet has quickly become one of my favorite pieces of jewelry. Leather is always in style baby!

----------------------------------------

This has been such a fun week, we hope you've all enjoyed the Made It for Me series too! Shannon and I want to say a huge thank you to the talented ladies who shared their projects with all of us this week - you're awesome! And thank you also to our readers. All of this wouldn't be any fun if it weren't for you. We hope you're inspired to make something for YOU this week! 

 In the spirit of making something for yourself, we're going to have a fun giveaway on Monday

Have a great weekend!

Thursday, April 25, 2013

Made It for Me: Jess of Me Sew Crazy


Today's guest is Jess from Me Sew Crazy! Jess is incredibly talented and one of the nicest people you could talk to (plus she lives in Virginia, which is where I (Jen) am from, so bonus cool points there.) We've been long time followers of her blog, and now of the beautiful patterns she sells in her shop.

Me Sew Crazy is a constant source of inspiration. Jess is always coming up with a new project for her adorable kids or herself.

Here's Jess with her beautiful clutch tutorial!

----------------------------------


Hi there. My name is Jess the Sewing Rabbit, and I blog over at Me Sew Crazy. I am so happy to be here today as a part of Jen & Shannon's Made it for Me Series.

When I first started sewing, I was primarily focused on children's clothing. There is just something about dressing my little ones in handmade clothing sewn with love that fills me with joy. And as I continue to stretch and grow with my talent, I have started to take on bigger challenges such as trying new techniques, and sewing for myself.

I love upcycling thrift store finds, finding a way to turn something old into something modern and fresh. Finding my own style among piles of fabric and a pattern, and figuring out just what I can do with a piece of ribbon that I fall in love with. Which is exactly how this clutch came about. I was shopping our local fabric store when I came across this woven black and white geometric ribbon. It was love at first site. I just knew I could do something fabulous with it.


I thought I would share with you a mini-tutorial today, how you can turn your ribbon into workable fabric. This works best with cotton or woven ribbon, as the firmer, starchier types are not going to have much movement to it.

I used just over 3 yards of fabric to make the clutch pictured above.


You may consider adding a stabilizer at this point to the wrong side of your ribbon to really firm it up. I personally wanted a loose look and feel to this clutch - with strong zig zag stitches that showed when looking at it. If you do not want the stitches to show, another option would be to closely whipstitch the edges together using a handheld needle and thread.  And that's it!

For instructions on how to make the clutch pictured above, there are two tutorials to visit. With leather bottom - the Leather accent fold-over clutch tutorial at You and Mie, without leather - Fold-over Doily Clutch by Skirt as Top.

They are both great tutorials, and will get you on your way to a great looking purse in no time.


Just some of the supplies you will need to make it.  And to give you an idea on timing, I was able to finish this in one nap-time sitting. Not bad if I do say so myself!

The leather tassel, that was probably the hardest part. And I am not kidding.


Thanks so much for having me here today Jen & Shannon. I love your blog and am so thankful that you would want for me to be a part of it!


----------------------------------

I've never thought to turn ribbon into fabric - brilliant! And the pattern and colors are perfect. Thank you for sharing such an awesome clutch that we are totally making for ourselves.

Make sure to head over to Me Sew Crazy and follow Jess to see more of her projects and patterns.


Tuesday, April 23, 2013

Made It for Me: Stephanie of Henry Happened


Stephanie of Henry Happened is that mommy friend we all wish we were: down to earth, fashionable, and seemingly able to do it all. She describes her blog as her "playground for staying curious and always learning," which is something that Shannon and I always encourage others to do. Henry Happened is a definite must-follow blog full of inspiration and great DIY projects that make handmade chic.

I first started following Stephanie in 2011 and since then, I've loved following the evolution of her blog and her fantastic tutorials. At Henry Happened, you'll find projects that are both trendy and fun (her no-sew zipper jeans refashion is one of my favorites!)

We're so excited to have Stephanie here as a guest for the Made It for Me series.
Take it away, Stephanie!
-----------------------------------------

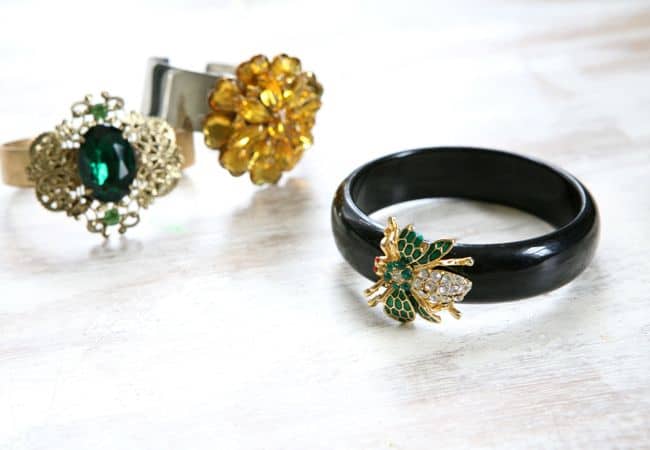
DIY Brooch Bracelet

Hello Eat.Sleep.Make readers! This is Stephanie from Henry Happened, and I write about DIY and style. Jen and Shannon's Made It for Me series really resonated for me because how often do moms get to make something pretty for ourselves? Or even shop for something new? My new clothes usually come from a 2-minute run through of Target when I'm there to buy diapers.

But today I'm going to show you something that I did make just for me. And love wearing because it has history and meaning, which makes it all the more special to me.

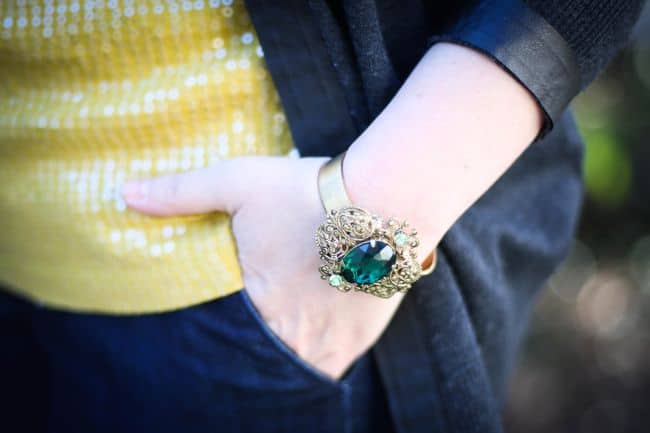
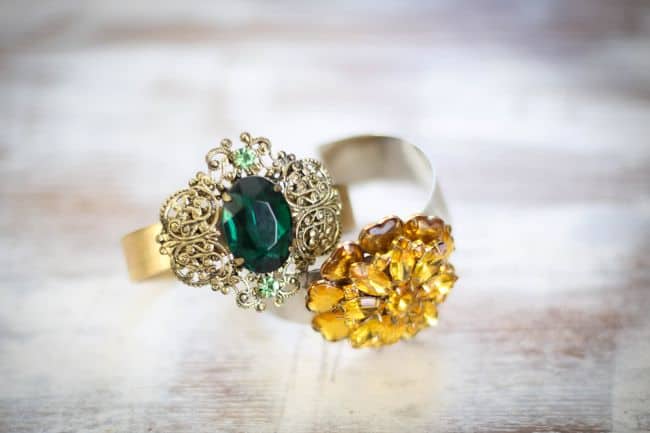
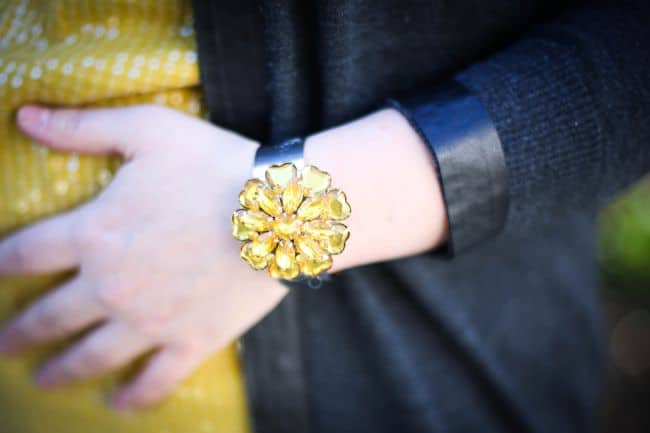
DIY bracelet with brooches

I love brooches - they are big and bold and colorful. Like most of my jewelry, the bigger the better! And I have quite a collection from my mother and grandmother (they liked big jewelry too, wonder where I get it from, huh?). But my antique brooches just sit there, looking pretty, on my dresser. Awhile back I made these brooch bracelets, just for me, so that I could wear my heirlooms more often.

These bracelets are super duper easy to make - probably less time than dashing through the jewelry aisle at Target. Just collect some old brooches - if you don't have a lonely collection already thrift stores often have these for cheap - and a couple of plain bangles. You can use metal or plastic bangles, whatever works for the brooch. Thrift stores are good for these too!

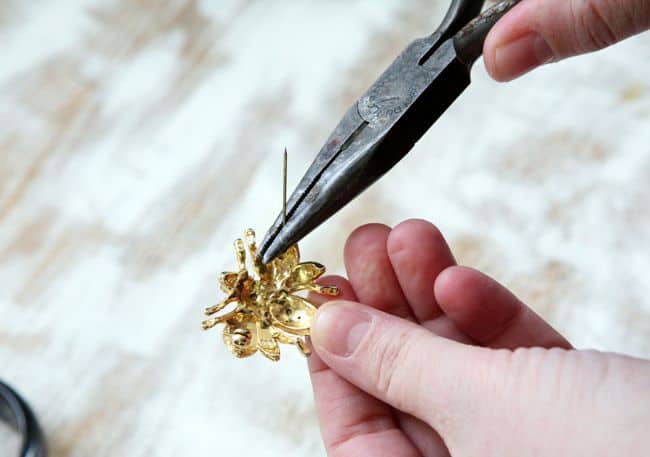
brooch bracelet tutorial

First remove the backing from the brooch. Wire cutters work best because you can get all they way down to to the base of the brooch, leaving a flat base.

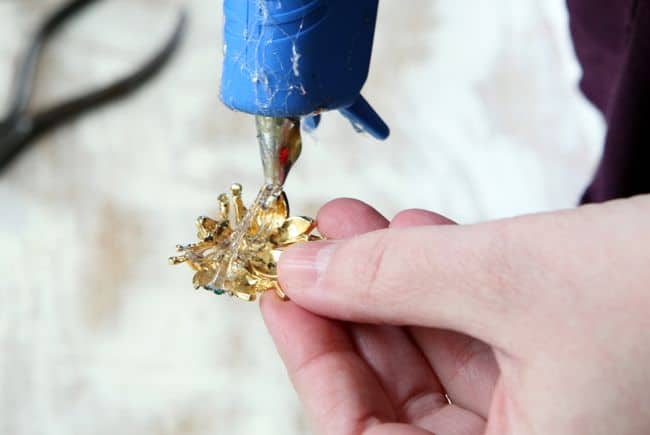
Bracelet tutorial with brooches

Then apply hot glue to the back and stick it to the bracelet. E6000 glue would also work but make sure you clamp and let it dry overnight to fully secure.

Brooch Bracelet DIYDIY Brooch Bracelet

That's all there is to it! Do you have brooches that you never wear? What do you love making just for yourself?

-----------------------------------------

Wow! Such stunning and sentimental pieces (and so easy to make!) If you don't have any brooches on hand, I bet you could find quite a few at your local thrift store or at estate sales. 

Thank you, Stephanie, for sharing such a gorgeous project. Make sure you visit Stephanie at Henry Happened and check out her other amazing projects!


 1. Glitter Striped Breakfast Tray 2. Homemade Cocoa Mint Soap 
3. Jewel Macrame Bracelets 4. No-Sew Zipper Jeans

Monday, April 22, 2013

Made It for Me: Andrea of Train to Crazy


Welcome to the first day of our Made It for Me series, where we're encouraging you guys to make something for YOU!

This week, we have invited some awesome guest posters to ESM to share projects they made for themselves, and for our first guest, we welcome the multi-talented Andrea of The Train To Crazy and Go To Patterns!

I'm sure most of you already know Andrea. She not only runs her own blog and link party each week, but she also heads up Go To Patterns, which hosts a team of extraordinarily talented designers and their patterns. I've been blog stalking following Andrea for years, and her talents never cease to amaze. How anyone can manage to raise 4 children, run a blog and a pattern shop is beyond me. I don't know how I manage to get myself out of bed and dressed half the time (and sometimes getting out of my pj's doesn't happen at all.)

Please help me welcome Andrea!

--------------------------------------

Thank you so much for inviting me to this great series! I was so glad to have a reason to sew for me! I usually sew for my kids though I do occasionally manage to sew something for myself. Lately it's been mostly Casual Ladies but for this challenge I made myself a purse. With leather corners. I've been wanting to make one like this for ages.

Fun handbag with leather corners #sewing by thetraintocrazy.com

I had picked up some leather scraps on a recent shopping trip. This leather is SO soft and wonderful. It is most likely really nice leather but I think I paid $5 for this bit I used.

Fun leather corners on a handbag. Great pattern! #sewing

I managed to just about match up the sides perfectly. When you look at it straight on it actually looks almost perfect.

The sewing pattern is the Rebecca Hangbag by Bev from Flamingo Toes. I omitted the ruffle that goes down the front. I actually think it would have been super cute if I had done the ruffle in the gray linen. But I wanted something a big simpler so I'll have to do the ruffle on my next one.

zip close handbag sewing pattern

I love a handbag that has a zipper closure. I don't exactly keep mine neat and tidy inside so this hides the chaos that lies beneath.

Rebecca-bag-interior-2

Confession: I intended to have the entire interior made from that gorgeous Kaffe Fassett but cut the fabric wrong and didn't have enough! So one huge pocket had to do. I like it though. A great pop of color.

Rebecca Handbag sewing pattern. Love it!! #sewing

All in all I do love the bag. I think I would keep the ruffle next time and maybe make the handle out of leather as well. But I didn't have enough because I cut the leather wrong as well. Do you ever have projects like that where you just seem to mess up everything? At least I love the results!

Thank you so much for having me! Stop on by my blog to say hi! And please also stop by my pattern shop to find something fun to make!

 -------------------------------------- 

First off, what a gorgeous bag! I love gray linen and leather together, so classy. Also, I'm more than a little jealous of your shopping trip to L.A. I would be poor if I had access to all of that wonderful fabric :)

Thanks for sharing, Andrea! Make sure you check out The Train to Crazy and Go To Patterns for more awesomeness!

Related Posts Plugin for WordPress, Blogger...