Photobucket

Monday, March 11, 2013

CRAFT: The Maddie Dress


OK, lets talk dresses! Spring is around the corner, and I've been itching to make my daughter some dresses. Today's tutorial is picture heavy because I wanted to really break down the drafting and assembly of the dress, but stick with me. Sewing a basic dress isn't as hard as it looks, and you'll be so proud seeing your daughter running around in a dress you made for her!

I remember the very first dress I made for Haley (wow, she was so little!), and it really stretched me and made me feel so accomplished when I was done. Now, as Haley's grown older, she is SO happy when I sew something for her - she calls the dresses I make her her "princess dresses."

Melt.

As you can see, she's more than happy to give you some diva poses.
This dress is a comfy knit dress with long sleeves, perfect for the remaining cold days and early spring. You could always shorten the sleeves, but I made mine long and plan on cutting them shorter as the weather gets warmer.

I made this dress with knit so it would be comfortable for my super active girl. If you've been avoiding knits, don't! They're comfortable, you don't have to finish the edges if you don't want to, and you can find lots of fun patterns at your local store or online at great shops like Southern Fabric, The Fabric Fairy, or Banberry Place.

SUPPLIES: a ballpoint needle is suggested for this project, but a universal needle will work fine (just beware that you may get holes in your fabric if you don't use a ballpoint needle,) long sleeve shirt to use as a template, paper, knit fabric -depends on your child's size, but I used about 1 1/2 yards for my daughter who is a 4T, buttons, disappearing ink marker, scissors, sewing machine and basic supplies.

DRAFTING YOUR PATTERN:
ONE: using an existing shirt, Fold the shirt in half and place on the edge of a piece of paper. Trace around the top part of your shirt to create a bodice. Make sure to add 1/2 inch seam allowance and stop tracing about 1 1/2 inches below the armhole.
TWO: for the bottom of your dress, measure your child 1 1/2-2 inches below the armpit to her knees. Add 1 1/2 inches to this measurement. This is how long you want the bottom of your dress to be. Draft your bottom piece by making it as wide as the bottom of the bodice you just drafted and as long as the measurement you just noted. I made mine a simple A-line. This will be for the back of your dress.

CUTTING OUT YOUR PIECES: 


ONE: notice that I've drawn a second neckline on my bodice piece. The lower one is for the front of the dress since you want the neckline to be lower. Since we're cutting out the back pieces, you can trace your pattern just as it is for now. Fold your fabric in half right sides together (and make sure the knit stretches sideways when you pull it) and place your bodice pattern on top, not on the fold. Add an inch for the button placket as shown in the picture above, then trace around with a disappearing ink marker and cut out. We are lining the bodice of this dress, so you want to repeat once more for a total of 4 back pieces.
TWO: to make your front pieces fold your fabric in half as before and place your bodice pattern on the fold this time. Trace around with a disappearing ink marker and cut out. Repeat for a total of 2 front pieces.
THREE: Now you should have 4 back bodice pieces and two front bodice pieces.

FOUR: for the back piece of the bottom of your dress, place your pattern on the fold and trace and cut one piece.
FIVE: for the front bottom of your dress, fold your fabric in half and place your fabric 3 inches from the fold as shown in the picture above (this is for our gathers.) Trace and cut one on the fold.

 SIX: (not shown) sorry I didn't take a better picture of this, but create sleeves using your template shirt as a guide. Again, make sure the knit stretches sideways across the sleeves. Add 3/4 inch to the end for the cuffs. Hem the cuffs by folding up 1/4 inch, then folding another 1/4 inch and sewing.

ASSEMBLY:
ONE: take your 4 back bodice pieces and match the two sets up, right sides together. Sew along the neckline only.
TWO: match up your two front pieces right sides together and sew along the neckline.
THREE: turn right side out and press.
FOUR: This may look a little weird, but you're basically trying to match up and sew your shoulder seams together so everything looks good. Do this by unfolding and laying your front piece out with the right side down. Do the same with your 2 back pieces and line up the shoulders as shown above. Join the shoulders together with a straight stitch.
FIVE: when you fold everything back up, it should look like this. Press. Set your stitch length to the highest number and sew a basting stitch around the arm holes. (You can sew your sleeves on now. I forgot to, but you can see how I attached mine in step 11.)
SIX: make button holes 1 inch from the edge of your right back bodice piece. Attach buttons on the left back bodice piece.
SEVEN: Turn your bodice inside out and sew the sides together (match up the sides of both lining pieces and sew right sides together, and repeat with the sides of the main fabric.) Turn right side out. Sew a basting stitch around the bottom of your bodice to keep the main and lining fabrics together.
EIGHT: take the front bottom panel of your dress and find the middle. Measure over 4 1/4 inches on either side and mark with your disappearing ink marker. This is where you will be making your gathers.
NINE: change the length and width of your stitch to the highest number, and sew a straight line between the two marks you just made. Pull the tail of your string to gather until the top of your panel is the same size as your bodice. Place the front and back panels right sides together and sew at the sides to join.
TEN: with the bottom of your dress inside out and your bodice right side out, insert your bodice into the bottom of the dress, making sure to match up the front of the bodice with the gathered bottom piece. Pin and sew to join the top and bottom pieces with a 1/2 inch seam allowance.
ELEVEN: unfortunately, I didn't add my sleeves earlier so this is how I did mine. With your dress inside out and your sleeves right side out, insert your sleeves in each armhole and pin all around Sew to attach. Finally hem up the bottom of your dress by folding up 1/4 inch, pressing, and folding another 1/4 inch and sewing.

So cute, right? It's such a comfortable, fun little dress. Throw a pair of leggings and boots underneath for winter and you have a cute new outfit. I love this pattern so much that I made several other versions of it, so get ready to be bombarded!

And in case you're wondering, I got the knit at my local Joann Fabrics. I fell in love with it the minute I saw it!


Enjoy! I'd love to see pictures if you make a dress for your little one (email us at eatsleepmake(at)gmail(dot)com)!


Check out our link party page to see where we link up each week!
photobucket

Friday, March 8, 2013

PARTY: Flynn Rider Satchel & Rapunzel Braid {Tangled Birthday Party}

 --Click HERE to see all Tangled-related posts and DIY's--

The handmade favors may be my favorite part of the entire party. I thought for a long time about what I wanted to give the kids as a thank you for coming. With a mix of both boys and girls, it was difficult to settle on something I liked that was gender neutral. Instead, I decided to cater to both and make Rapunzel braids for the girls and Flynn Rider satchels for the boys!


To Make Flynn Rider's Satchel:


SUPPLIES: brown felt (1/4 yd is more than enough), brown bias tape, buttons, elastic cord, thread, sewing machine and supplies, glue gun.
ONE: first, cut a rectangle of felt that is 16 inches long and 5 inches wide. Also cut 30 inches of bias tape for the strap.
TWO: fold the bottom of your felt rectangle up 6 inches and sandwich the end of your bias tape under each side. Pin to secure.
THREE: sew a straight line from the bottom of your bag to the top. When you reach the top, lift your presser foot and turn the bag, then sew a few stitches across and down to secure your bias tape. Repeat on the other side.
FOUR: your bag should look like this so far!
FIVE: for your closure, cut a piece of bias tape several inches long, and sandwich the ends of a loop of elastic cording 3 inches long inside.
SIX: pin your bias tape and cording to your bag and stitch around the perimeter to. Backstitch a few times when you reach the elastic to make sure it's secure.
SEVEN: (essential to making sure the satchel doesn't look like a purse!) pick out a button for the bag. You want something with a "boy-ish" feel to it. I found these awesome buttons in my stash and they were perfect for this bag.
EIGHT: hand stitch your button on.
NINE: Flynn Rider's bag has a small scrap on the bottom with hand stitching. To make this, cut a small piece of felt and use a needle and contrasting thread to make a blanket stitch around the side (learn how to make a blanket stitch HERE.) Hot glue the scrap to your satchel. 

To Make Rapunzel's Braid:
SUPPLIES: yellow yarn, thin purple ribbon, packing tape, hot glue, fake flowers.

I feel a little silly posting a tutorial for this because it's so easy, but here it is :)

ONE: I found this golden yellow thread at Walmart. One package was enough to make 10 braids with a TON of yarn left over.
TWO: cut 6 strands of yarn about 36 inches long. tie an overhand knot at one of the ends and tape to a table or other surface.
THREE: separate 2 strands each and braid until you reach the end.
FOUR: using your purple ribbon, tie a bow around the end.
   

To finish, wrap the braid around the child's head and tie a knot. Hot glue a fake flower over your knot to hide it. Dance around like Rapunzel :)


Check out our link party page to see where we link up each week!
photobucket

Thursday, March 7, 2013

PARTY: Tangled Party Games {Tangled Birthday Party}

--Click HERE to see all Tangled-related posts and DIY's--

This birthday party was so different for me because her past few birthdays have consisted primarily of family and close friends. This year, we allowed Haley to invite her whole preschool class, so I was a little intimidated because I knew I had to entertain a mass of children. I also had the added challenge of making sure the games weren't too "girly" since more than half of her schoolmates are boys. After scouring blogland for inspiration, and coming up with a few ideas myself, I decided on 4 different games/activities that turned out to be a lot of fun (and they're preschool friendly!)

1. Pin the Nose On Flynn Rider
I've seen this one on several blogs before (sorry, but I'm not sure where it originated. If you do, please let me know so I can cite appropriately!)

I had a second engineer print made, just as I had for the "wanted" photo booth HERE, but this time I didn't cut out the middle. The poster was simply taped to the wall with tape.


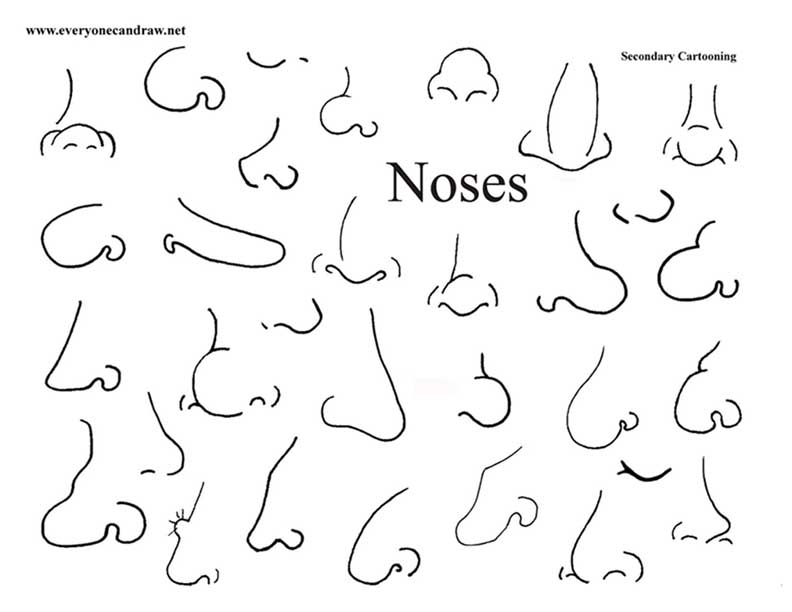
I found the noses online by googling "nose caricatures." After sorting through a bunch of nonsense, I found this page full of perfect noses on everyonecandraw.net. I used my Silhouette Cameo to cut them out on card stock.


I put double sided tape on the back of the noses, and each child was blindfolded and instructed to try to "pin the nose on Flynn Rider." The kids got clever on me and, as they went to "pin" the noses on, they felt with their fingers where the other kids had taped the noses so they all got the noses right in the middle so everyone got prizes :)

2. Feed Pascal:

For this game, I found the template and tutorial on how to make cute Pascal party blowers on DisneyFamily.com. I then attached some adhesive velcro to the tip of Pascal's "tongue" and adhered the other side of the velcro to some fruit images I printed out. 

The kids were then challenged to use Pascal's tongue to pick up as many pieces of fruit as they could in under a minute. 

3. Tangle a Friend

(No picture because we didn't get to this one.) I partnered the kids up and gave each partner a roll of yellow streamers. The kids were told to tangle their partner up in the streamer as fast as they could. The child who tangled up his partner the fastest won a prize.


4. Make Your Own Lantern
I purchased a stack of colored card stock and adhesive foam shapes and allowed the kids to decorate their own lanterns. I also brought my daughter's supply of stickers, markers and crayons from home. When the kids were done, I used a hole punch to punch 2 holes in the top and attach clear line to hang. Easy and cute!


I will say, after all the preparation I did for the games, the kids were too busy making their own fun (which was great!) so we were only able to do 2 of the games. Next time, I think I'll stick to a craft and 1 game. 


Check out our link party page to see where we link up each week!
photobucket

Wednesday, March 6, 2013

PARTY: Wanted Poster Photo Booth {Tangled Birthday Party}

--Click HERE to see all Tangled-related posts and DIY's--


I thought it would be a lot of fun for both the kids and parents to have a photo booth at Haley's Tangled party.  The kids are finally at the age where they like to dress up and pretend, plus I thought it'd be a fun keepsake for the parents to take home with them.

Since Flynn Rider's wanted posters show up several times in Tangled, I immediately pictured the kids posing behind a wanted poster. But how to make one the size I wanted without making it look corny? Mandy of Sugar Bee Crafts posted a great tutorial last year on how to make a giant picture by ordering an engineer print from your local office store, so that's exactly what I did.

I found the Flynn Rider poster HERE and used Photoshop to change it to black and white and remove the "wanted dead or alive part." I wasn't sure how parents would feel about that part ;)

 
From there, I went to my local FedEx Kinkos and had them print the smallest engineer print they had (I believe it was an 18x24) in black and white for only $0.75/foot. They do print engineer prints in color as well, but the cost is $8/ft. and I wasn't feeling like spending that much for something I was about to cut up. I used spray adhesive to mount it to foam board (found at Walmart) and then I used my X-Acto knife to trim the edges and cut out the middle.  Clear line and packing tape was all I needed to hang the poster from the ceiling so the kids could stand behind it for pictures.  

As you can see, Haley loved it:


For the props, the only dress up stuff that I had on hand is princess gear - and  I knew the boys would hate that - so I opted for paper props instead. I found the awesome printables on Oh Happy Day! HERE and HERE. Jordan saved my butt, I was about to try to design my own and they wouldn't have looked near as good as hers! I simply glued them to wooden skewers and let the kids model away.


We simply hung the sign from the ceiling with clear wire and packing tape. As you can see, the kids loved it!


C
heck out our link party page to see where we link up each week!
photobucket

Tuesday, March 5, 2013

PARTY: Tangled Birthday Invites {Tangled Birthday Party}

--Click HERE to see all Tangled-related posts and DIY's--


Yet again, I couldn't keep myself away from making birthday invites, even after the torture I went through to make Connor's Knight Party invites. I had SO much fun planning Haley's Tangled birthday party that I didn't need to force myself to be creative (which happens a lot more than you might think :) With all my crazy DIY-ing, I initially considered buying invites; but then a thought came to me: "Why not make themed invites that require the recipients to "untangle" Rapunzel's hair to get all the party details?"

You know I couldn't buy invites from a store with inspiration like that.

I designed the cards in Photoshop and made them in such a way that the card reads "Untangle for more details" while the ribbon "hair" is wrapped around it so the reader understands that they have to unwrap the ribbon for all the party details. Fun, right? I did it this way to work in the party theme and to make it interactive.

I won't be sharing the file for this one (sorry, I hope to possibly sell it eventually!) But I will share how I made it in case you want to do something similar.
Use double sided tape to tape the end of some ribbon to the back of the card. Proceed to wrap the ribbon around the card, hiding the details of the party so that only the wording "Untangle for more details" is visible. Tape the other end of the ribbon down with more double sided tape and tie with skinny purple ribbon.

That's it! Pretty simple really, but so fun and whimsical. You may have noticed that the colors of ribbon in the main picture and tutorial are different shades. Initially, I wasn't able to find the perfect shade of golden yellow that I was looking for. Then (after I had already made and distributed all of the cards!) I found the perfect golden grosgrain ribbon at Hobby Lobby. Sigh. Oh well, I still think they turned out great and I think I'm the only one that cared about the ribbon color.


Check out our link party page to see where we link up each week!
photobucket

Monday, March 4, 2013

PARTY: Tangled Birthday Party {Food and Decorations}

This past weekend, my little girl turned 4! She is a little girly girl (unlike I was at her age!), so her heart was set on having a Tangled birthday party. I got inspired and started planning everything a little over a month ahead of time so I didn't feel like a mad woman the day before the party.

I had so much fun planning everything and went crazy DIY-ing almost everything except the plates and plastic ware. (But I'm sure I would have done that too if I could ;) With all of the energy and time I put into everything, I would hate to try to shove so many tutorials and pictures into one giant post, so this week is going to be dedicated to all the details and DIY's that went into putting on a Tangled birthday party, from the invites I made to games and the handmade favors.

If your child is having a Tangled party, this whole week is for you! And even if you aren't planning a Tangled party, you can at least enjoy the pictures I hope :)
Today, I'm primarily going to focus on the decorations and food. Later in the week, I'll share tutorials for the favors, photo booth, and games we played. Also, HUGE thanks to Shannon for taking most of these pictures! I was running around like a mad woman trying to get 14 children age 4 and under to focus on activities :)

The Food
I love party food! I'm a big grazer, so parties are the perfect excuse for me to load up my plate with a little of everything. The food for this party was a little more difficult to plan because several of the children in Haley's class have gluten, egg, and peanut allergies. Add that to the fact that we were expecting close to 40 people at lunchtime, and I had quite the challenge!
For those with gluten and tree nut allergies, I made gluten-free Rice Krispie treat "paintbrushes," which were Rice Krispie treats (made with gluten free Rice Krispies) cut in rectangles and dipped in colored candy melts (Wilton candy melts are gluten-free by the way!) I then inserted an ice cream stick into each and stuck them into foam blocks covered in tissue paper. Please ignore the fact that they're falling over. Ahem.

For those with tree nut allergies, I made little Sunbutter and jelly sandwiches cut with a sunburst cookie cutter I purchased from the Cookie Cutter Shop (quick shipping and great price!) I made regular PB&J's for the rest of the kids. A fruit tray and Nutella fruit dip were also a quick and easy addition for those with tree nut allergies. Just mix greek yogurt and Nutella and instant fruit dip!

Aside from the specialty foods, we also had PB&J's, pink yogurt covered pretzels, pigs in a blanket, chips, Bagel Bites, and pink lemonade with lemons floating it it (are you sensing the pink, yellow, and purple theme?) My absolute favorite food, though, were the sunburst cookies. 

These cookies turned out so pretty! I've never worked with royal icing until this weekend and let me tell you, it's time consuming. I knew I had to have sun cookies, and the only way to make them look as polished as I wanted was to use royal icing. What I didn't anticipate is that that decorating 60+ cookies would take 5 hours. Worth it? Yes. But man, my frosting muscles hurt. Again, I used the sunburst cookie cutter from The Cookie Cutter Shop.

The royal icing recipe I used is from Bridget at Bake at 350, and it was so much better than I expected! Just the right flavor and consistency. Bridget also explains how to decorate with royal icing to get the best results. This is definitely my go-to royal icing recipe for the future. The sugar cookies were from a mix, I'm not ashamed. You gotta draw the DIY line somewhere!

The Cake
Oh the cake. It turned out just like I wanted. I was going to originally purchase a Rapunzel cake from a local bakery, but then I saw Martha Stewart's ruffle tower cake and I had to make one. The cake was a white cake mix, and the vanilla buttercream frosting is Shelly's from Cookies and Cups. My husband was disappointed that I didn't make cream cheese frosting, but he at the cake and lived, and everyone else seemed to like it since we only had 3 slices left over.

I dyed the layers ombre-style in 3 different shades of purple because, why not? I was already crazy enough to shut 14 young children into a small space and load them up with sugar, so it might as well be pretty. The cupcakes were strawberry at Haley's request, and not as pretty because I ran out of time or else they would have been ruffled too. I also made the "happy birthday" banner and attached it to skewers with yellow yarn.

The Decorations
 I wish I would have taken more pictures of the decorations, but again, busy running around like a crazy woman!

I made the tissue paper flowers on the wall by folding and stapling together pieces of tissue paper. The flag bunting was made by cutting out triangles and sunburst shapes with my Silhouette Cameo (love that thing!) and stringing them onto ribbon. Side note: Silhouette cutters do NOT love construction paper, so don't try it. It's no fun to pick all the little fibers off of the cutting mat either. In retrospect, I should have just stuck with card stock.

The tablecloths were yellow and purple to go along with the theme, and I also made some yellow table runners for the food tables from plastic tablecloths. Other than that, we tossed a bunch of pink and purple balloons on the floor for the kids and called it a day!
  

Haley had the BEST time, which she kept repeating to me over and over. Her favorite part of the whole party? When everyone sang happy birthday to her (as you can tell from her big smile in the picture above.)

I am beyond tired, but so happy with how everything came out! The kids had a great time - and that's all that really matters. I feel so amazingly blessed by all of the wonderful friends and family that came to celebrate my little girl turning one year older.

 Make sure you check back the rest of the week for more Tangled-related DIY's!


Check out our link party page to see where we link up each week!
photobucket

Friday, March 1, 2013

Books We Love!

It's Friday!!  I am especially excited about it being Friday because I, Shannon, am leaving for Disneyworld on Sunday!!  I will have 8 days of awesomeness in Florida with my husband, mom and aunt.  That's right, NO KIDS.  It's pretty much the most fun place on earth to go without children. 

So, in preparing for vacation, you know a necessity is a good book (or two).  I'm sharing with you all my absolute favorite reads from the past year.  These are all the first books of these series, and most of the second books and some of the third are already released.

Let me just say that if you liked The Hunger Games and Twilight, you will love these books, too!


In Beatrice Prior's dystopian Chicago world, society is divided into five factions, each dedicated to the cultivation of a particular virtue--Candor (the honest), Abnegation (the selfless), Dauntless (the brave), Amity (the peaceful), and Erudite (the intelligent). On an appointed day of every year, all sixteen-year-olds must select the faction to which they will devote the rest of their lives. For Beatrice, the decision is between staying with her family and being who she really is--she can't have both. So she makes a choice that surprises everyone, including herself.

During the highly competitive initiation that follows, Beatrice renames herself Tris and struggles alongside her fellow initiates to live out the choice they have made. Together they must undergo extreme physical tests of endurance and intense psychological simulations, some with devastating consequences. As initiation transforms them all, Tris must determine who her friends really are--and where, exactly, a romance with a sometimes fascinating, sometimes exasperating boy fits into the life she's chosen. But Tris also has a secret, one she's kept hidden from everyone because she's been warned it can mean death. And as she discovers unrest and growing conflict that threaten to unravel her seemingly perfect society, she also learns that her secret might help her save those she loves . . . or it might destroy her.

They say that the cure for Love will make me happy and safe forever.
And I've always believed them.
Until now.
Now everything has changed.
Now, I'd rather be infected with love for the tiniest sliver of a second than live a hundred years smothered by a lie.
Lena looks forward to receiving the government-mandated cure that prevents the delirium of love and leads to a safe, predictable, and happy life, until ninety-five days before her eighteenth birthday and her treatment, when she falls in love.

When Thomas wakes up in the lift, the only thing he can remember is his first name. His memory is blank. But he’s not alone. When the lift’s doors open, Thomas finds himself surrounded by kids who welcome him to the Glade—a large, open expanse surrounded by stone walls.

Just like Thomas, the Gladers don’t know why or how they got to the Glade. All they know is that every morning the stone doors to the maze that surrounds them have opened. Every night they’ve closed tight. And every thirty days a new boy has been delivered in the lift.

Thomas was expected. But the next day, a girl is sent up—the first girl to ever arrive in the Glade. And more surprising yet is the message she delivers.

Thomas might be more important than he could ever guess. If only he could unlock the dark secrets buried within his mind.

Cassia has always trusted the Society to make the right choices for her: what to read, what to watch, what to believe. So when Xander's face appears on-screen at her Matching ceremony, Cassia knows with complete certainty that he is her ideal mate... until she sees Ky Markham's face flash for an instant before the screen fades to black.

The Society tells her it's a glitch, a rare malfunction, and that she should focus on the happy life she's destined to lead with Xander. But Cassia can't stop thinking about Ky, and as they slowly fall in love, Cassia begins to doubt the Society's infallibility and is faced with an impossible choice: between Xander and Ky, between the only life she's known and a path that no one else has dared to follow.

Mara Dyer doesn’t think life can get any stranger than waking up in a hospital with no memory of how she got there.
It can.
She believes there must be more to the accident she can’t remember that killed her friends and left her mysteriously unharmed.
There is.
She doesn’t believe that after everything she’s been through, she can fall in love.
She’s wrong.
We know you are here, our brothers and sisters . . .
Pressia barely remembers the Detonations or much about life during the Before. In her sleeping cabinet behind the rubble of an old barbershop where she lives with her grandfather, she thinks about what is lost-how the world went from amusement parks, movie theaters, birthday parties, fathers and mothers . . . to ash and dust, scars, permanent burns, and fused, damaged bodies. And now, at an age when everyone is required to turn themselves over to the militia to either be trained as a soldier or, if they are too damaged and weak, to be used as live targets, Pressia can no longer pretend to be small. Pressia is on the run.

Burn a Pure and Breathe the Ash . . .
There are those who escaped the apocalypse unmarked. Pures. They are tucked safely inside the Dome that protects their healthy, superior bodies. Yet Partridge, whose father is one of the most influential men in the Dome, feels isolated and lonely. Different. He thinks about loss-maybe just because his family is broken; his father is emotionally distant; his brother killed himself; and his mother never made it inside their shelter. Or maybe it's his claustrophobia: his feeling that this Dome has become a swaddling of intensely rigid order. So when a slipped phrase suggests his mother might still be alive, Partridge risks his life to leave the Dome to find her.

When Pressia meets Partridge, their worlds shatter all over again.

Graceling by Kristin Cashore
His eyes, Katsa had never seen such eyes. One was silver, and the other, gold. They glowed in his sun-darkened face, uneven, and strange. She was surprised that they hadn't shone in the darkness of their first meeting. They didn't seem human....

Then he raised his eyebrows a hair, and his mouth shifted into the hint of a smirk. He nodded at her, just barely, and it released her from her spell.

Cocky, she thought. Cocky and arrogant, this one, and that was all there was to make of him. Whatever game he was playing, if he expected her to join him he would be disappointed.


In a world where people born with an extreme skill—called a Grace—are feared and exploited, Katsa carries the burden of the skill even she despises: the Grace of killing. She lives under the command of her uncle Randa, King of the Middluns, and is expected to execute his dirty work, punishing and torturing anyone who displeases him.

When she first meets Prince Po, who is Graced with combat skills, Katsa has no hint of how her life is about to change.

She never expects to become Po's friend.

She never expects to learn a new truth about her own Grace—or about a terrible secret that lies hidden far away...a secret that could destroy all seven kingdoms with words alone.
Do you have any books you love?  We'd love to hear about them! We are always looking for new books to read... obviously, we go through a lot of them in a short time (this is barely a pinch of what we've read !) Tell us in the comments what books you loved this year!


**All book summaries are via Goodreads
Related Posts Plugin for WordPress, Blogger...