Photobucket
Showing posts with label Rapunzel. Show all posts

Friday, March 8, 2013

PARTY: Flynn Rider Satchel & Rapunzel Braid {Tangled Birthday Party}

 --Click HERE to see all Tangled-related posts and DIY's--

The handmade favors may be my favorite part of the entire party. I thought for a long time about what I wanted to give the kids as a thank you for coming. With a mix of both boys and girls, it was difficult to settle on something I liked that was gender neutral. Instead, I decided to cater to both and make Rapunzel braids for the girls and Flynn Rider satchels for the boys!


To Make Flynn Rider's Satchel:


SUPPLIES: brown felt (1/4 yd is more than enough), brown bias tape, buttons, elastic cord, thread, sewing machine and supplies, glue gun.
ONE: first, cut a rectangle of felt that is 16 inches long and 5 inches wide. Also cut 30 inches of bias tape for the strap.
TWO: fold the bottom of your felt rectangle up 6 inches and sandwich the end of your bias tape under each side. Pin to secure.
THREE: sew a straight line from the bottom of your bag to the top. When you reach the top, lift your presser foot and turn the bag, then sew a few stitches across and down to secure your bias tape. Repeat on the other side.
FOUR: your bag should look like this so far!
FIVE: for your closure, cut a piece of bias tape several inches long, and sandwich the ends of a loop of elastic cording 3 inches long inside.
SIX: pin your bias tape and cording to your bag and stitch around the perimeter to. Backstitch a few times when you reach the elastic to make sure it's secure.
SEVEN: (essential to making sure the satchel doesn't look like a purse!) pick out a button for the bag. You want something with a "boy-ish" feel to it. I found these awesome buttons in my stash and they were perfect for this bag.
EIGHT: hand stitch your button on.
NINE: Flynn Rider's bag has a small scrap on the bottom with hand stitching. To make this, cut a small piece of felt and use a needle and contrasting thread to make a blanket stitch around the side (learn how to make a blanket stitch HERE.) Hot glue the scrap to your satchel. 

To Make Rapunzel's Braid:
SUPPLIES: yellow yarn, thin purple ribbon, packing tape, hot glue, fake flowers.

I feel a little silly posting a tutorial for this because it's so easy, but here it is :)

ONE: I found this golden yellow thread at Walmart. One package was enough to make 10 braids with a TON of yarn left over.
TWO: cut 6 strands of yarn about 36 inches long. tie an overhand knot at one of the ends and tape to a table or other surface.
THREE: separate 2 strands each and braid until you reach the end.
FOUR: using your purple ribbon, tie a bow around the end.
   

To finish, wrap the braid around the child's head and tie a knot. Hot glue a fake flower over your knot to hide it. Dance around like Rapunzel :)


Check out our link party page to see where we link up each week!
photobucket

Thursday, March 7, 2013

PARTY: Tangled Party Games {Tangled Birthday Party}

--Click HERE to see all Tangled-related posts and DIY's--

This birthday party was so different for me because her past few birthdays have consisted primarily of family and close friends. This year, we allowed Haley to invite her whole preschool class, so I was a little intimidated because I knew I had to entertain a mass of children. I also had the added challenge of making sure the games weren't too "girly" since more than half of her schoolmates are boys. After scouring blogland for inspiration, and coming up with a few ideas myself, I decided on 4 different games/activities that turned out to be a lot of fun (and they're preschool friendly!)

1. Pin the Nose On Flynn Rider
I've seen this one on several blogs before (sorry, but I'm not sure where it originated. If you do, please let me know so I can cite appropriately!)

I had a second engineer print made, just as I had for the "wanted" photo booth HERE, but this time I didn't cut out the middle. The poster was simply taped to the wall with tape.


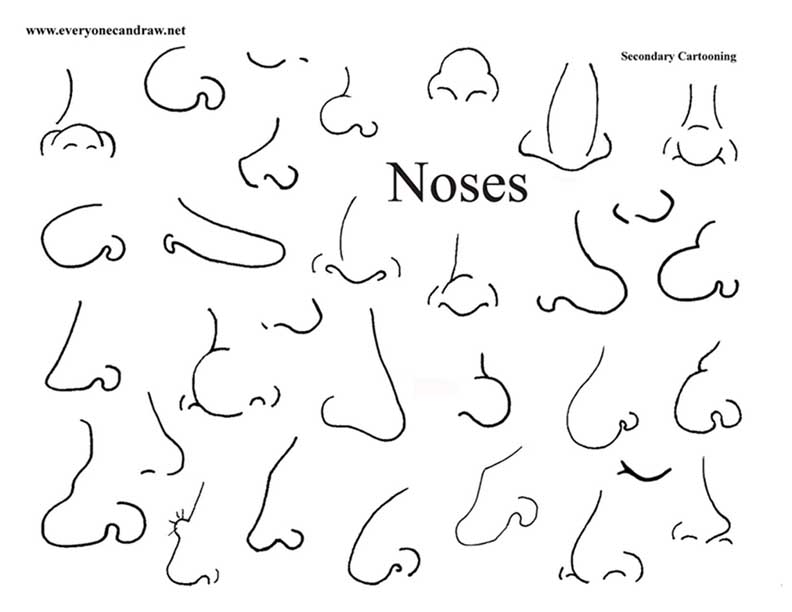
I found the noses online by googling "nose caricatures." After sorting through a bunch of nonsense, I found this page full of perfect noses on everyonecandraw.net. I used my Silhouette Cameo to cut them out on card stock.


I put double sided tape on the back of the noses, and each child was blindfolded and instructed to try to "pin the nose on Flynn Rider." The kids got clever on me and, as they went to "pin" the noses on, they felt with their fingers where the other kids had taped the noses so they all got the noses right in the middle so everyone got prizes :)

2. Feed Pascal:

For this game, I found the template and tutorial on how to make cute Pascal party blowers on DisneyFamily.com. I then attached some adhesive velcro to the tip of Pascal's "tongue" and adhered the other side of the velcro to some fruit images I printed out. 

The kids were then challenged to use Pascal's tongue to pick up as many pieces of fruit as they could in under a minute. 

3. Tangle a Friend

(No picture because we didn't get to this one.) I partnered the kids up and gave each partner a roll of yellow streamers. The kids were told to tangle their partner up in the streamer as fast as they could. The child who tangled up his partner the fastest won a prize.


4. Make Your Own Lantern
I purchased a stack of colored card stock and adhesive foam shapes and allowed the kids to decorate their own lanterns. I also brought my daughter's supply of stickers, markers and crayons from home. When the kids were done, I used a hole punch to punch 2 holes in the top and attach clear line to hang. Easy and cute!


I will say, after all the preparation I did for the games, the kids were too busy making their own fun (which was great!) so we were only able to do 2 of the games. Next time, I think I'll stick to a craft and 1 game. 


Check out our link party page to see where we link up each week!
photobucket

Wednesday, March 6, 2013

PARTY: Wanted Poster Photo Booth {Tangled Birthday Party}

--Click HERE to see all Tangled-related posts and DIY's--


I thought it would be a lot of fun for both the kids and parents to have a photo booth at Haley's Tangled party.  The kids are finally at the age where they like to dress up and pretend, plus I thought it'd be a fun keepsake for the parents to take home with them.

Since Flynn Rider's wanted posters show up several times in Tangled, I immediately pictured the kids posing behind a wanted poster. But how to make one the size I wanted without making it look corny? Mandy of Sugar Bee Crafts posted a great tutorial last year on how to make a giant picture by ordering an engineer print from your local office store, so that's exactly what I did.

I found the Flynn Rider poster HERE and used Photoshop to change it to black and white and remove the "wanted dead or alive part." I wasn't sure how parents would feel about that part ;)

 
From there, I went to my local FedEx Kinkos and had them print the smallest engineer print they had (I believe it was an 18x24) in black and white for only $0.75/foot. They do print engineer prints in color as well, but the cost is $8/ft. and I wasn't feeling like spending that much for something I was about to cut up. I used spray adhesive to mount it to foam board (found at Walmart) and then I used my X-Acto knife to trim the edges and cut out the middle.  Clear line and packing tape was all I needed to hang the poster from the ceiling so the kids could stand behind it for pictures.  

As you can see, Haley loved it:


For the props, the only dress up stuff that I had on hand is princess gear - and  I knew the boys would hate that - so I opted for paper props instead. I found the awesome printables on Oh Happy Day! HERE and HERE. Jordan saved my butt, I was about to try to design my own and they wouldn't have looked near as good as hers! I simply glued them to wooden skewers and let the kids model away.


We simply hung the sign from the ceiling with clear wire and packing tape. As you can see, the kids loved it!


C
heck out our link party page to see where we link up each week!
photobucket

Tuesday, March 5, 2013

PARTY: Tangled Birthday Invites {Tangled Birthday Party}

--Click HERE to see all Tangled-related posts and DIY's--


Yet again, I couldn't keep myself away from making birthday invites, even after the torture I went through to make Connor's Knight Party invites. I had SO much fun planning Haley's Tangled birthday party that I didn't need to force myself to be creative (which happens a lot more than you might think :) With all my crazy DIY-ing, I initially considered buying invites; but then a thought came to me: "Why not make themed invites that require the recipients to "untangle" Rapunzel's hair to get all the party details?"

You know I couldn't buy invites from a store with inspiration like that.

I designed the cards in Photoshop and made them in such a way that the card reads "Untangle for more details" while the ribbon "hair" is wrapped around it so the reader understands that they have to unwrap the ribbon for all the party details. Fun, right? I did it this way to work in the party theme and to make it interactive.

I won't be sharing the file for this one (sorry, I hope to possibly sell it eventually!) But I will share how I made it in case you want to do something similar.
Use double sided tape to tape the end of some ribbon to the back of the card. Proceed to wrap the ribbon around the card, hiding the details of the party so that only the wording "Untangle for more details" is visible. Tape the other end of the ribbon down with more double sided tape and tie with skinny purple ribbon.

That's it! Pretty simple really, but so fun and whimsical. You may have noticed that the colors of ribbon in the main picture and tutorial are different shades. Initially, I wasn't able to find the perfect shade of golden yellow that I was looking for. Then (after I had already made and distributed all of the cards!) I found the perfect golden grosgrain ribbon at Hobby Lobby. Sigh. Oh well, I still think they turned out great and I think I'm the only one that cared about the ribbon color.


Check out our link party page to see where we link up each week!
photobucket
Related Posts Plugin for WordPress, Blogger...