


This post was previously featured on The Sewing Rabbit, and I'm bringing it home today. Enjoy!

My sister-in-law recently gave my daughter a pair of the cutest strawberry printed skinny pants from Gymboree. The only problem was that they were squeezing the circulation out of my daughter's already tiny buns. I was able to get them on her, but it wasn't without lots of tugging and pulling and uncomfortable pressure on her belly. I couldn't bear to see the pants go without being worn, so I decided to utilize the tuxedo stripe trend and let the pants out by adding a stripe of material to either side side of the pants. It worked like a charm!
Trendy and useful? Check and check.

It's relatively easy to take in a pair of pants that are too big, but usually much more difficult to let out a pair of pants that are too tight without going to a tailor. This method got me the results I wanted while also following a trend at the same time. I call that a win in my book!
Let's get refashioning!
SUPPLIES: 1 pair of tight pants in need of adjusting, coordinating material to use for the stripe (use bottom weight fabric like twill, denim, corduroy, etc.), seam ripper, heavy duty or denim needle, sewing machine and basic sewing supplies.

Here is the pair of pants I started with. I didn't get a picture of my daughter in them beforehand, but let me tell you, they were tiiiiiiight!

I chose to go with denim that I had in my stash because it matched perfectly with my pants. There are a lot of great color choices in bottom weight fabrics out there though. You could also go with a contrasting fabric, but I didn't want to go too crazy since the pants already had a busy pattern to them.
Deconstructing Your Pants:

ONE: using your handy dandy seam ripper, carefully rip the stitches on each side of your pants from below the waistband to the bottom of the pant leg.

TWO: now, if your pants have an adjustable waistband like mine did, make sure to unbutton the elastic and push it back into the waistband away from the side seam so you don't cut it accidentally in the next step.

THREE: now I know this part can be a little scary but you're now going to cut your waistband on each side, being sure to avoid cutting the elastic from your adjustable waistband if you have one. Just make a straight cut following your side seam.
FOUR: open your pants up and wonder what you just did to your poor pants. Just kidding, stick with me! :)
Adding The Tuxedo Stripe:

ONE: measure the full length of your pants from right below your waistband to the bottom and add 1 inch for seam allowance. You'll also need to include the length of your waistband (you'll see why in the next few steps), so measure from the top to the bottom of your waistband and multiply x2 (to include the length of both the front and back.) Mine was 1 1/2 inches from top to bottom x 2, so 3 inches total. Add that to your other total length measurement.
TWO: decide how much total width you want to add to your pants depending on how tight they are and divide by 2, then add 1/2 inch for seam allowance. I decided to add a total of 3 inches to the pants, so each stripe would need to be 1 1/2 inches wide plus 1/2 inch, so 2 inches each. Cut 2 from the lengths and widths you determined above, making sure the stretch of the fabric, if there is any, is going sideways.
THREE: next, unpick your waistband by about 1 1/2 inches.
FOUR: open your waistband so it lays flat. Extend one of your tuxedo stripes 1/2 inch over the edge of the waistband and line the raw edge of one of your tuxedo stripes up with the raw edge of your pants, right sides (or pattern sides) together (see picture below.)
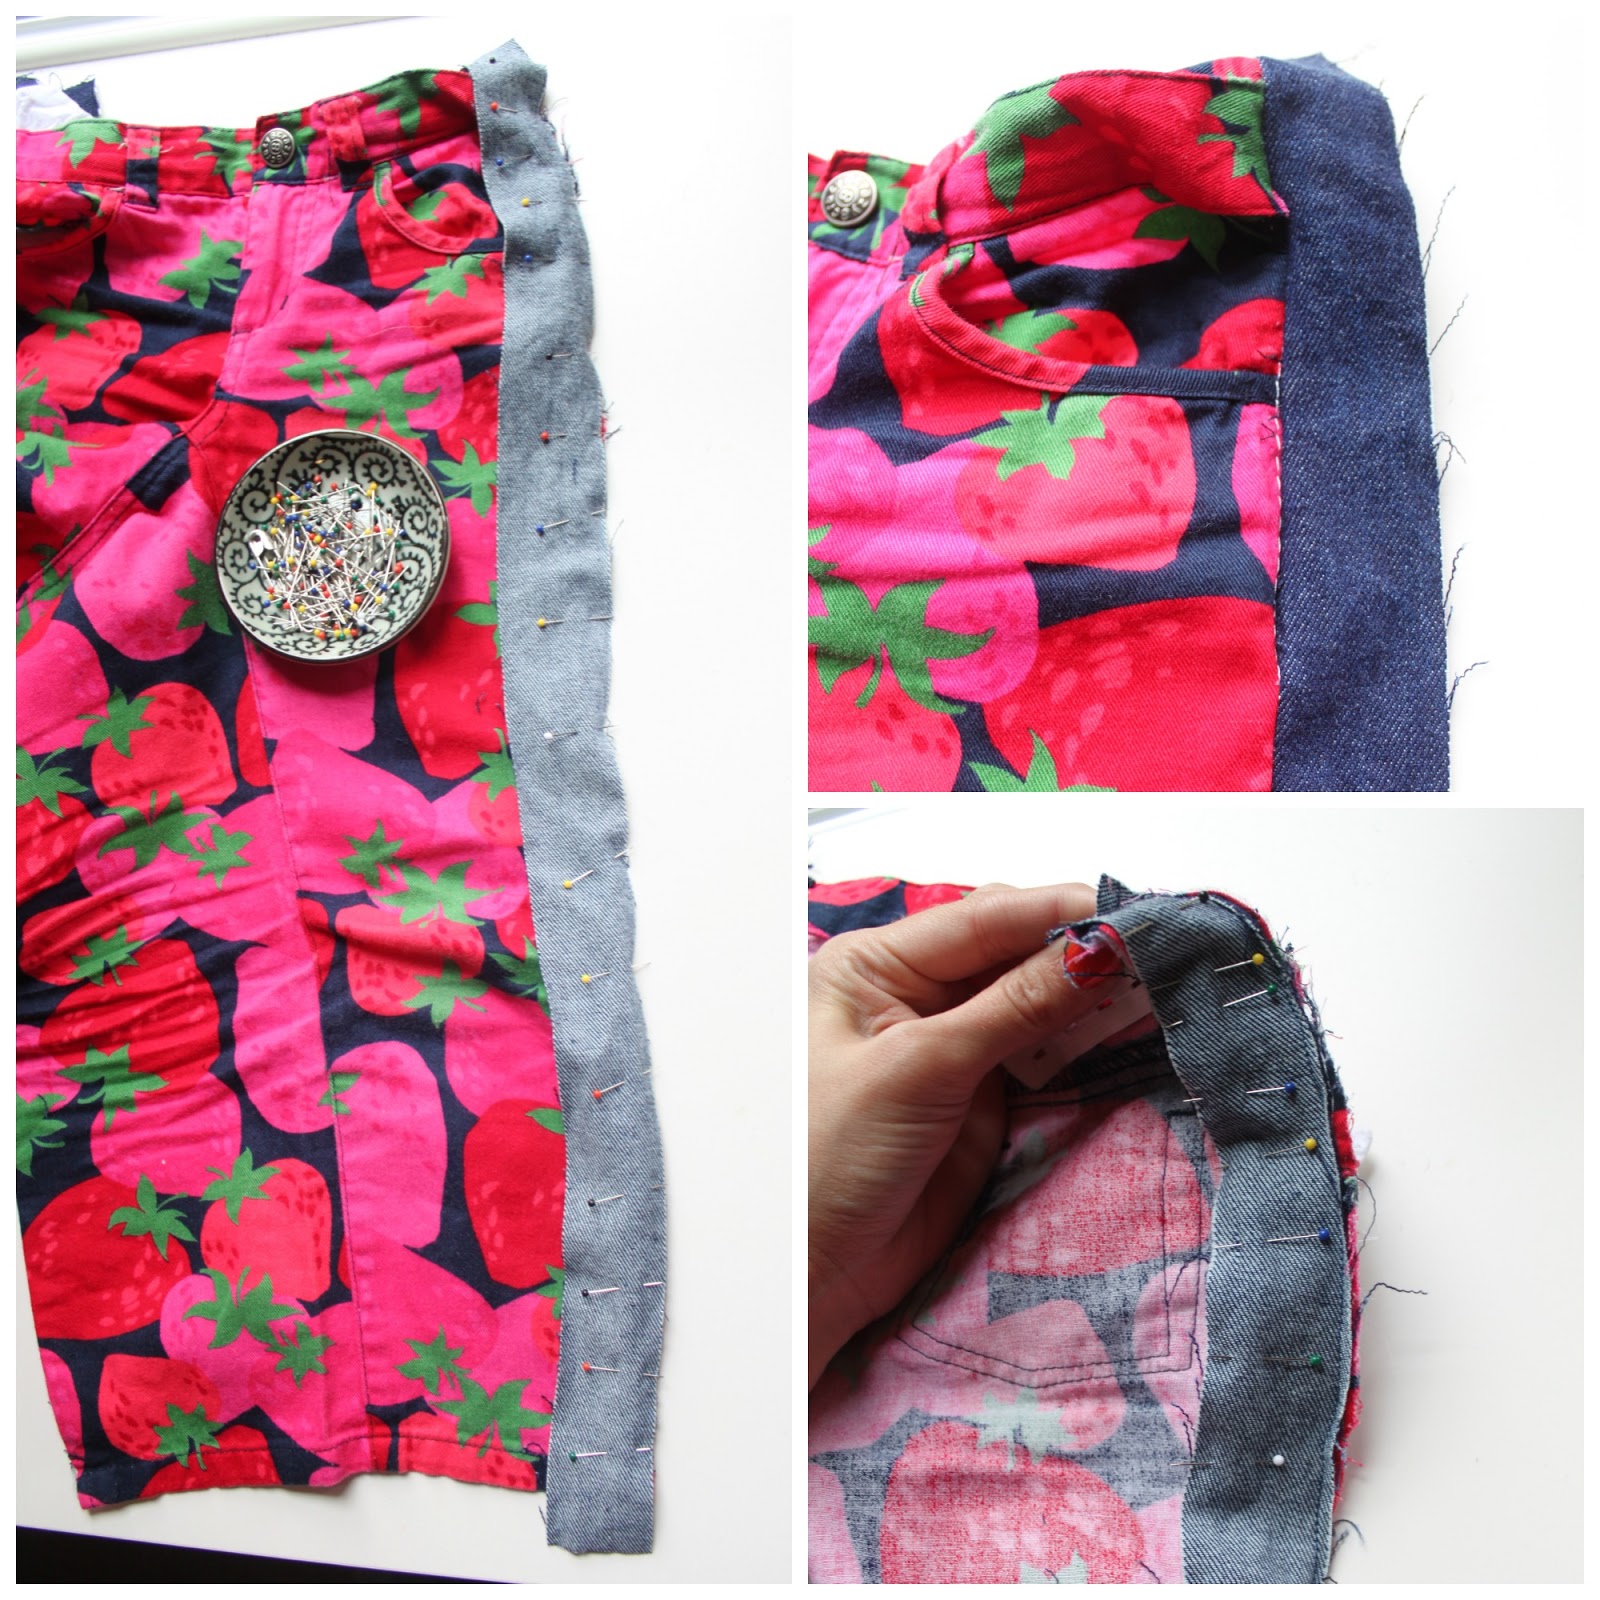
FIVE: pin your stripe along the raw edges and sew with your heavy duty needle.
SIX: unfold your tuxedo stripe and press.
SEVEN: Fold your pants so the raw edge of the remaining side of your tuxedo stripe matches up with the other side of your pant leg, right sides together, and pin all along the edge. Sew. Zig-zag or serge the long edges. Repeat steps 1-7 to attach the other tuxedo stripe.
Finishing:

ONE: fold your waistband down.
TWO: if you have an adjustable waistband, reinsert your adjustable elastic back into the hole where it was before.
THREE: turn the raw edge of your tuxedo stripe under, and stitch along the bottom of the waistband, following the original lines of the waistband.
FOUR: you should now have a nice, finished waistband!

FIVE: now to finish the cuff of the pants, just fold the raw edge a couple of times so the raw edge is contained (like you did with the waistband above.)
SIX: stitch along the bottom following the original hemline.

Now you have a pair of pants that won't cut off your circulation anymore with the added bonus of being trendy :) I'm a little jealous that my daughter has a pair of tuxedo striped pants and I don't. I'll have to change that soon!


While this method would certainly work for most pants, remember that you're adding width all over the pants, including the leg area, so the skinny jeans I added the stripe to are now roomier, straight leg pants. If you have pants that already have a wide leg, you may need to take the inseam in a bit after adding the stripe unless you don't mind the extra width. Make sense?
I hope this little trick helps to save some pants that were destined for the trash!

Such a brilliant idea and she looks so cute!
ReplyDelete