Photobucket

Monday, December 1, 2014

DIY Wood Burned Picture Frame


I've been wanting to try wood burning for the longest time. Every so often, I like to try new crafting methods to see what I can make, and this one was at the top of my to-do list. This month, Michael's challenged us to make a handmade gift for a friend or family member, so I took that as a sign that I needed a wood burner stat, so I picked up a wood picture frame and wood burner and sat down to make something (hopefully) awesome for my parents.

As someone who hasn't drawn anything more than a stick figure since high school, I was a little intimidated by the thought of permanently burning something into a piece of wood that my parents would have to look at forever (or at least when we visit and they have to dig it out of the closet.) After trying out a few simple designs on a piece of scrap wood though, I was hooked. It was way easier than I expected and the result was a really fun chevron-burned frame that I know my parents will love!


Moral of the story? If you're scared of wood burning, don't be. I can barely draw a stick figure, but I still managed to make this awesome frame without burning a finger - and that in itself is a Christmas miracle.

So let's make a wood burned frame!


SUPPLIES: a wood burning tool, unfinished wooden picture frame, photo, wood stain or paint (I used watered down acrylic paint by Martha Stewart), pencil, ruler, scrap wood -optional but highly recommended if you've never tried wood burning before, sealant.


If you've never tried wood burning, I recommend getting a piece of scrap wood and practicing first instead of jumping in and hoping for the best. You'll learn that different woods burn differently, and you can change the look and texture of the lines by bearing down on the wood burning pen differently. Practice until you're comfortable!


ONE: for a similar chevron design like I did, use your pencil and ruler to draw lines on your frame. I didn't make them symmetrical. I was going for a rough, sketchy look.


TWO: following the directions on your wood burning pen, heat it up and use a steady hand to trace over your drawn lines.
THREE: after your main lines are burned, draw chevron lines with your pencil and ruler


FOUR: trace over your remaining lines with your wood burning pen.


FIVE: stain with wood stain or, as I did, water down some paint and paint on with a paintbrush. Let dry.


SIX: after your paint has dried, seal with preferred sealant (I used a spray on matte sealant.)


After my frame was finished, I went to Target and had an 8x10 of my family printed up and put it in the frame. I can't get over Connor's face...the kid does NOT like having his picture taken! We actually had to have a pep talk about smiling for his school pictures this year, not that it helped any.


For the finishing touches, I picked up some bell ornaments, wood Christmas tags, and red twine from Michael's to wrap up my handmade gift.


I wrapped it simply in kraft paper, and tied the twine around it with the ornaments attached. For a special touch, I decided to also wood burn the tag. The pack came with 12, so I'm excited to make more for the other gifts I'm wrapping.


PS, wood burning curves is not easy :)


And that's it! A beautiful handmade gift that I know will get a LOT of use at my parents' house, especially as the grand kids grow over the years.


I hope you enjoyed my handmade gift and wrapping! Check out the other amazing handmade gifts from the Michael's Makers below to get you inspired for the holidays.


Thursday, November 20, 2014

Some Happy Buns!


More PJ's? Always PJ's, if you ask me. Especially when they have an adorable little bum panel like these Happy Buns Britches by Peek-a-Boo Patterns (affiliate) do. I told you I had an unhealthy obsession with making PJ's, and I'd be lying if I said this is the last pair I'd be making anytime soon.


This moose print and stripe print (both by Girl Charlee) were just begging to be made into PJ's, so who am I to ignore that call? I mean, seriously, the cuteness of that little bum.


We've had plenty of chilly days laying around the house watching TV and eating popcorn lately, so snuggly PJ's were just the thing this little guy needed. And the little bum panel on the Happy Buns Britches was the perfect solution for my out of control scrap pile. You only need a small scrap for the back, and there's even an option for a larger panel if you little one wears cloth diapers (which mine does not.)


The Happy Buns Britches are on sale for 15% off today only, so snag your discounted copy while you can. And psst, they're great for girls too. I love a good unisex pattern!

Monday, November 17, 2014

'Thankful For You' Neighbor Gift and Free Printable

Eighteen. That is the number of loaves of apple bread I've baked in the past month. With November being a prominent month to show thankfulness to others, I wanted to really focus on the people I'm most grateful for and give them something to show my gratitude. And what better way to do that than with something edible, amirite?

My kids and I took a trip with some friends to a local apple orchard to pick apples for the first time recently. It was SO much fun to wander the rows upon rows of apple trees in search of the perfect, juicy apples. We even did a little tree climbing to reach the ones at the very top. Well, mine was more of a slipping-shimmying-desperately grasping branches-thing, but my limbs remained intact, so that's a win in my book. We all had a great time, and I ended up walking away with a huge bag of every variety of apple you can imagine.


In my quest to figure out what to do with all of the lovely apples I stumbled upon this recipe. I made a couple substitutions (no nuts, 1 cup white sugar and 1 cup brown sugar, added vanilla, made 2 mini loaves instead of 1 big loaf) and crossed my fingers that it would turn out well. As I'm sure you gathered by the 16 additional loaves of bread that followed, the recipe was amazing. Moist, flavorful, and apple-y. Which, thanks to this recipe, is now a word.

I spent the next week living in the kitchen baking and eating apple bread, which is a pretty great life if you ask me.


Apple-y goodness like this must be shared, so when I eventually made it out of the kitchen, I made some free printables (go here to download) so that you can share some yummy apple bread with your neighbors too. Or just keep it all to yourself, I won't tell. I made 2 versions to choose from - a chalkboard tag and some in pretty fall colors.


Just print these babies up, add some kraft paper and twine and you have a treat that your neighbors will love you for.

Also, I can't be blamed for any subsequent addiction that you may develop to the apple bread.


Friday, November 14, 2014

#MichaelsMakers Dream Tree Challenge Part 2


So let's talk Christmas décor inspiration.  What inspires your Christmas décor?  This year I wanted to do something woodsy, rustic, log cabin-ish.  I'm so incredibly happy with the way the tree turned out!  It feels so cozy when it's all lit up, wrapped in flannel and flanked in fur. 

To get this feel, we used the flannel ribbon and burlap ribbon from Michaels.  I made the pine cone garland last year (link below).  We focused mostly on natural materials for the ornaments, but threw in some glitzy gold stuff here and there.

If you saw our video in the last tree post, you saw our idea of using a paper mache deer head for the tree top was an utter failure, and we ended up using a stick star that I already had.  It fit in so perfectly with the theme!


      If you haven’t seen our Dream Trees yet, stop by The Glue String to see all 30 – they will blow you away!
You can help spread some holiday cheer by sharing a photo of my dream tree or any trees that inspire you this year on Facebook, Twitter or Instagram, tag your friend, use the hashtag #TagATree and encourage them to do the same!
Michaels has a variety of Make it Merry projects for you and your family to work on this season!
Below are some of our Christmas DIYs from last year.. check em out and get inspired!

http://www.eatsleepmake.com/2013/12/diy-pine-cone-garland.html

http://www.eatsleepmake.com/2013/12/diy-basswood-trees.html

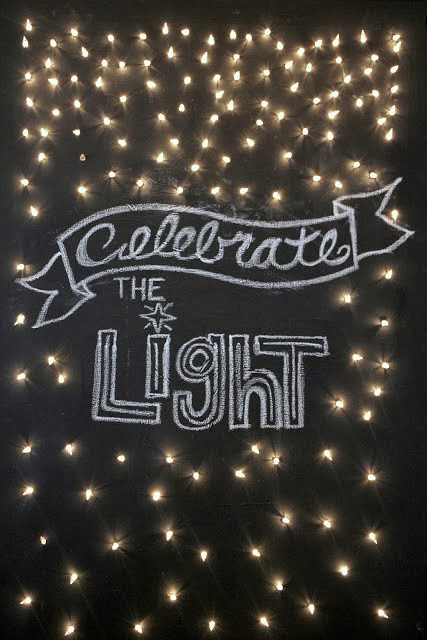
http://www.eatsleepmake.com/2012/12/craft-celebrate-light-canvas.html


Thursday, November 13, 2014

A Pretty Party Dress


Long time no see! It may seem like I've been sitting on my hands, but it's actually been quite the opposite. Between starting a new job and sewing for a wedding, Halloween, winter, my daughter's first piano recital, and making gifts for Christmas (yep, that's happening already) I've had my hands full! I have so many posts that are partially started, so hopefully one day very soon I'll be able to catch my breath and share all that I've been making with you.

One thing that I actually got a head start on, is making this beautiful lace holiday dress by Peek-a-Boo Patterns (affiliate) for my daughter


This is the Gloria Party Dress, and it's a versatile pattern that can be both a dressy party dress or a comfy play dress, depending on what material you want to use. I opted to make the fancy version, which has a sheer stretch lace overlay with knit underneath, so it's still a super comfortable dress compared to a lot of the stiff holiday dresses you see out there.


I love the peek-a-boo back!

The gorgeous stretch lace is from Girl Charlee, but it looks like this particular one is no longer in stock. You can find other colors here though. The lining is a navy knit from Jo-Ann Fabrics, and the navy ribbon is from there as well. The gray and navy together give the dress a more sophisticated look that I love. 


This girl loves her dresses, so she was thrilled with this one and with how comfortable it was, and demanded to wear it all day. I'm a mean mommy and made her take it off at dinner though so she wouldn't get spaghetti all over her new dress :)


You can snag your copy of the Gloria Party Dress in the shop today for 15% off (today only)! Go get a head start on your holiday dress making!


This post contains affiliate links. Thank you for your support!


Saturday, November 1, 2014

#MichaelsMakers Dream Tree Challenge


Hello!! So we decided to do something a little different this month.. we did a VIDEO!  What??? Let me tell you guys, it was a blast!  We had so much fun.  We managed to squeeze 8 hours of shopping and decorating into 11 MINUTES.  Check out our video... Follow us as we shop for Christmas at Michael's, watch as we show you our haul and tell you our plans, then be amused as we attempt to decorate with children running around, my cat climbing the Christmas tree, and ideas not going quite as planned.  Most importantly, get INSPIRED and get in the Christmas Spirit!  When you finish the video, let us know what you think!  Should we keep up with doing videos?  Do you guys like it?  I feel they're slightly more personal because you guys get to see us... how we are for real.  Bottom line, we're goofy.  There's no way around it. 

Also, make sure to change the setting to HD.. much better quality video!  Click the little gear in the bottom right of the video window.


Stop by Michaels’ blog, The Glue String, to see the full Dream Tree Challenge and all of the fabulous trees that were created this year by the Michaels Makers.  Head into Michaels Nov. 2 through Nov. 8 for the Make It Merry Tree Event  – 50% off all trees 6 ft. or taller!!! To kick off the holiday season, make sure and check out of Michaels’ Make it Merry  inspiration book or all kinds of holiday tips and projects.


<!-- end InLinkz script —>
Related Posts Plugin for WordPress, Blogger...